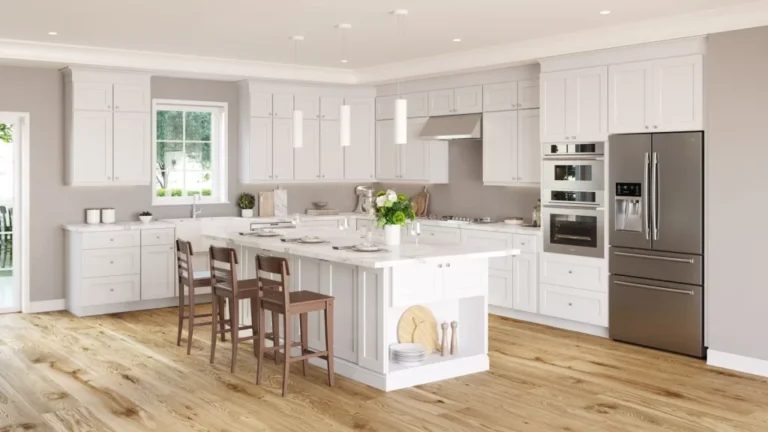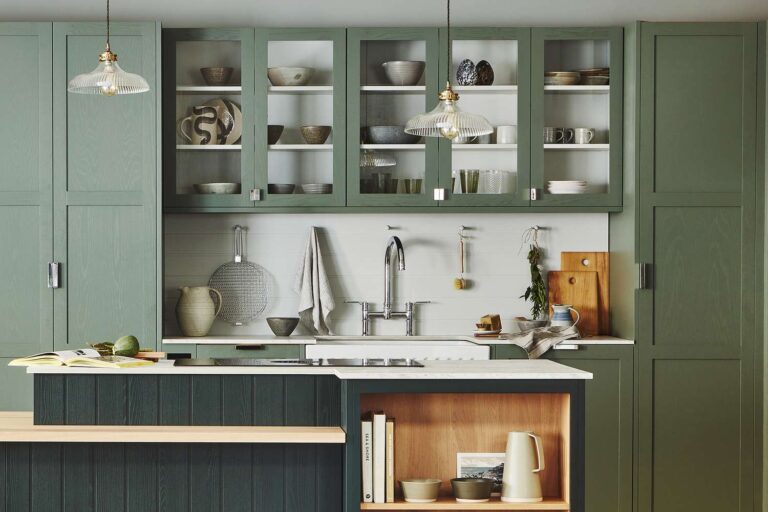
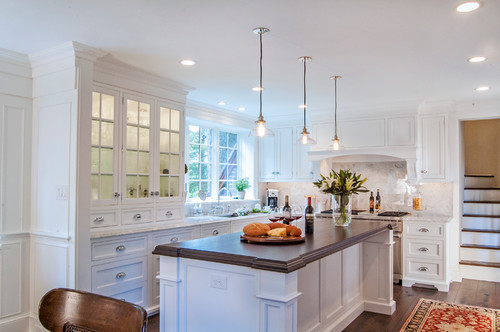
Kitchen cabinet units are the undisputed cornerstone of any culinary space. They do far more than just store your plates and pantry goods; they define the room’s utility, dictate its workflow, and stand as the primary expression of your home’s aesthetic character.
A kitchen renovation is one of the single most impactful investments you can make in your Canadian home, and the cabinetry is its heart. At rtadepot.ca, we understand this profound impact. We provide beautiful, high-quality kitchen cabinetry engineered to resolve your storage dilemmas, elevate your home’s overall interior design, and transform your daily life. We are here to help you discover modern kitchen storage cabinets, durable materials, and timeless styles that last.
Your kitchen is the hub of your home, the place where days begin and end, where families connect, and where memories are made. But when this central space is failing, it creates a ripple effect of daily frustration. This guide is for you—the homeowner in Canada who is ready for an immediate, beautiful, and practical change, kitchen cabinet.
1. Why Your Current Kitchen Cabinets Are Holding You Back

If you are reading this, you are likely facing a familiar set of challenges. The frustration of an inefficient kitchen is not just a minor inconvenience; it is a daily obstacle to the comfortable, organized life you want to live, kitchen cabinet.
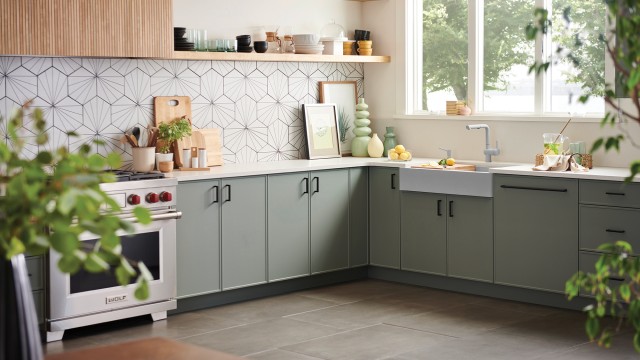
- The Problem of Outdated Aesthetics: Your current kitchen fixtures might be structurally sound, but they are visually stuck in another decade. Worn-out finishes, dated wood tones like honey oak, or ornate raised-panel doors can make your entire home feel old and out of step with your modern lifestyle. This visual weight can make you feel uninspired, or even embarrassed, to host friends and family, kitchen cabinet.
- A Critical Lack of Storage: This is the most common complaint. You lack effective, intelligent storage. This results in countertops piled high with appliances, utensils, and mail. Drawers are overstuffed, and finding the right spice or pot becomes an archaeological dig. This disorganization is not a personal failing; it is a design failure, kitchen cabinet.
- Inefficient and Illogical Layouts: Your current setup simply does not work for you. Perhaps the cabinet doors open the wrong way, blocking a key pathway. Maybe you have a deep, dark corner cabinet where items go to be lost forever. This lack of utility turns cooking from a creative joy into a frustrating chore, forcing you to take extra steps and fight against your own space, kitchen cabinet.
- The Desire for a Personal Statement: You want a home that reflects who you are. An organized, aesthetically pleasing space is a form of self-care. It creates a calm, comfortable environment for your family and serves as a backdrop for your life. Your kitchen should be a source of pride, not a source of stress, kitchen cabinet.
- The Affordability-Customization Gap: You have started your search, only to find two extreme options: generic, low-quality flat-pack boxes from a big-box store, or astronomically expensive, fully custom cabinetry with a three-month lead time. You are struggling to find that sweet spot: a high-quality, durable, semi-custom solution that fits the unique dimensions of your home without the designer price tag, kitchen cabinet.
2. The Solution: Your Path to a High-Function, High-Style Kitchen
This is precisely where rtadepot.ca changes the narrative. We provide the solutions you are looking for, tailored to solve the exact problems you face. We are not just a cabinet seller; we are your partner in transformation.
- We Optimize Your Storage: Our expertise is in maximizing every square inch, especially in the space-constrained homes common in cities. Our professional designers are masters of spatial logic, using clever inserts, vertical storage, and smart layouts to create a place for everything, kitchen cabinet.
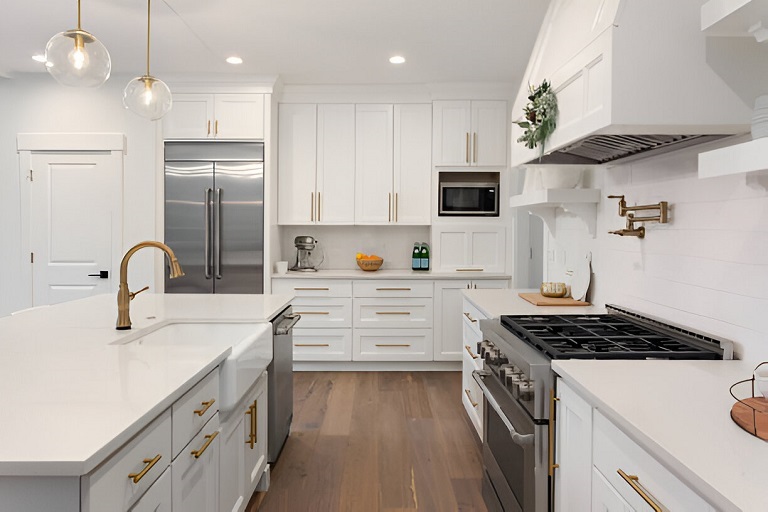
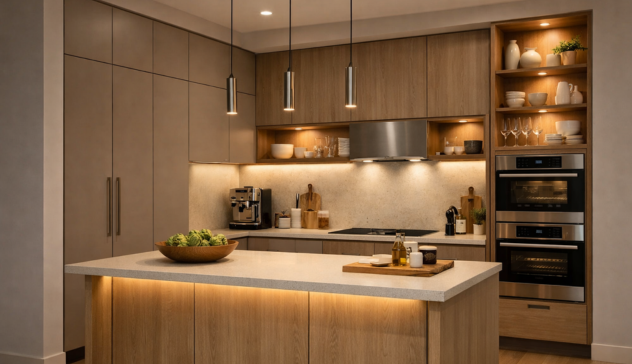
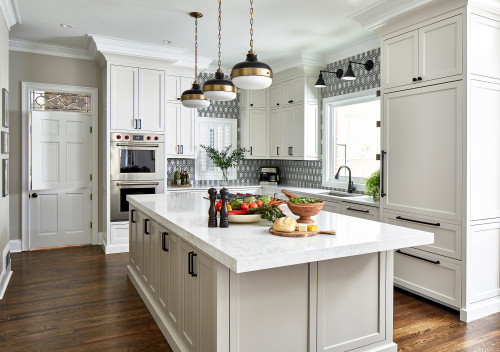
- We Deliver an Aesthetic Upgrade: We provide a curated selection of modern, transitional, and classic styles. From the sleek, white shaker cabinets that bring light and air into a space to the rich, warm tones of a Mid-Century Modern kitchen cabinet look, we have the components to create your dream kitchen.
- We Guarantee Durability: Our kitchen storage units are built to last. We use premium materials, such as solid wood frames (like Maple), plywood boxes (not particle board), and durable, easy-to-clean finishes. This is an investment designed for long-term use, kitchen cabinet.
- We Offer Flexible Installation: Are you a dedicated DIYer? Our Ready-to-Assemble (RTA) cabinets are a fantastic, cost-saving option featuring high-end construction and simple assembly. Would you rather have it done for you? Our network of professional, reliable installers ensures your project is completed flawlessly, kitchen cabinet.
- We Provide Expert Design Consultation: This is our most valuable service. You do not have to do this alone. Our design consultants are on standby to help you select the perfect models, colors, and materials. We use your measurements to create a free, photorealistic 3D rendering of your new kitchen, allowing you to see your vision come to life before you ever spend a dollar.
The kitchen cabinet of your dreams is not a far-off fantasy. It is an achievable, affordable reality for your home in Canada, and the process can begin today.
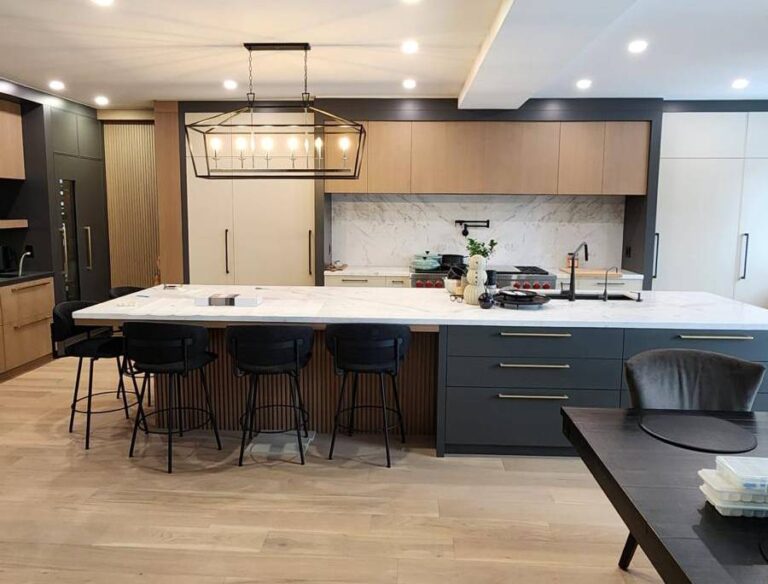
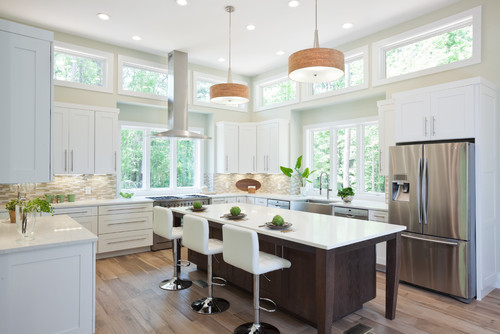
3. Achieving the Timeless Mid-Century Modern Cabinet Look

One of the most persistent and beloved design movements, especially for kitchen remodeling, is Mid-Century Modern (MCM). This style, which originally flourished from the 1940s to the 1960s, is celebrated for its clean lines, organic forms, and an emphasis on functional, uncluttered living. If you are struggling with a kitchen that feels heavy and outdated, the MCM aesthetic is the perfect solution. Achieving the Mid-Century Modern Cabinet look is about embracing a philosophy of elegant simplicity, kitchen cabinet.
This style is not just for period homes. Its principles are timeless, and it can be integrated beautifully into contemporary, transitional, and even minimalist spaces. It is a guide to Mid-Century Modern kitchen cabinet style that focuses on materials, form, and function.
3.1 Key Features of Mid-Century Modern Cabinets
To successfully emulate this style, you must focus on its core components. These key features of mid-century modern cabinets are what give the look its distinct, enduring character, kitchen cabinet.
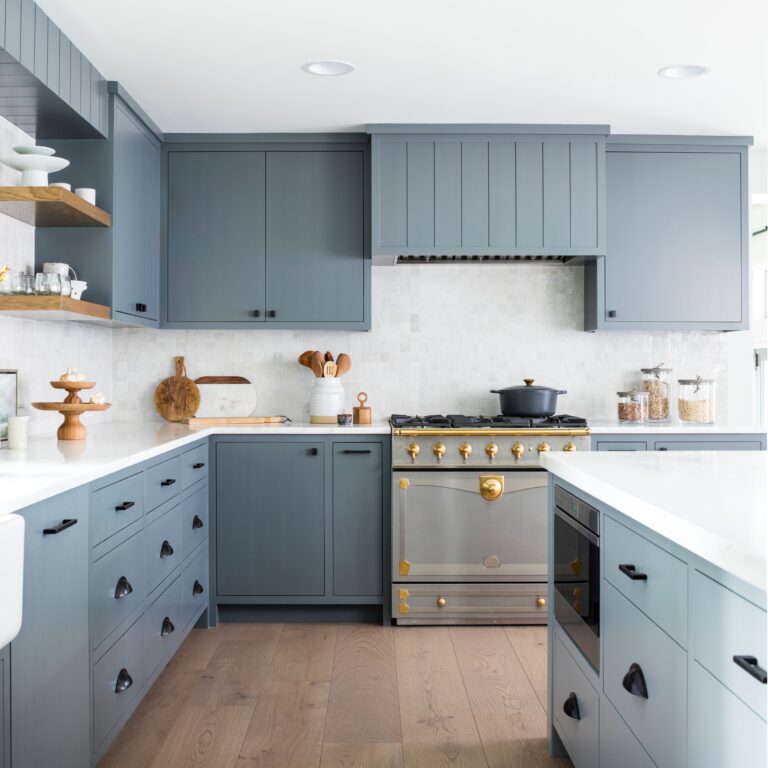
- Flat-Panel Doors: This is the most crucial element. MCM design avoids ornate details. The cabinet doors are almost always flat, also known as ‘slab’ doors. This clean, unadorned surface shifts the focus from decoration to the inherent beauty of the material itself, kitchen cabinet.
- Rich Wood Grains: This style celebrates the honesty of materials. Natural wood is the star. Walnut and Teak are the most iconic choices, prized for their deep, warm, and rich grain patterns. Oak and even cherry in a natural or light-stain finish also fit the aesthetic perfectly. These wood tones provide a sense of warmth and organic texture.
- Minimalist Hardware: The hardware is intentionally subtle. The goal is to maintain the long, clean lines of the cabinetry. You will often see:
- Slim Bar Pulls: Long, rectangular pulls in a brushed brass or matte black finish, kitchen cabinet.
- Subtle Knobs: Small, simple round or square knobs.
- Integrated Handles: A popular choice where a cut-out or beveled edge on the door or drawer itself acts as the pull, eliminating the need for external hardware entirely.
- Floating Appearance: Many MCM base cabinets or standalone buffets are elevated on slender, tapered legs. This simple design choice makes the furniture, and by extension the room, feel lighter and more spacious by allowing you to see the floor underneath.
3.2 How to Style Mid-Century Modern Cabinets
Your cabinet choice is the foundation. How to style Mid-Century Modern Cabinets involves a curated selection of complementary finishes and fixtures.
- Countertops: Keep them simple. A bright white quartz countertop with a thin profile (e.g., 0.75-inch or 1.25-inch edge) provides a stunning, clean contrast to the warm wood cabinets. Materials like terrazzo or even high-quality laminate in a retro pattern can also be used.
- Backsplash: Think geometric and clean. A stacked subway tile (where tiles are aligned in a grid rather than a running bond) in a simple white, gray, or an earthy green is a classic choice. Penny-rounds or small hex tiles also add texture without competing with the wood grain.
- Lighting: This is a place to make a statement. Look for fixtures with organic shapes or geometric flair. Sputnik chandeliers, globe pendants, and simple, cone-shaped sconces are all iconic lighting choices that enhance the MCM feel.
- Color Palette: The wood is the star, so the surrounding palette should be supportive. Popular choices include:
- Neutrals: Warm whites, light grays, and charcoal.
- Earthy Tones: Olive green, terracotta, and mustard yellow.
- Bold Accents: A single wall or appliance in a bold teal or burnt orange.
3.3 Examples of Mid-Century Modern Cabinet Designs
There are many ways to execute this look. Our design team can help you visualize these examples of mid-century modern kitchen cabinet designs in your own space.
- The Two-Tone: A very popular and practical approach. Use the warm, wood-grain cabinets for all the base units and the kitchen island. Then, use sleek, white flat-panel cabinets for the uppers. This draws the eye up, makes the space feel taller, and keeps the wood from overwhelming the room.
- The Full Wood: For the purist, a full wall of floor-to-ceiling walnut cabinets creates a dramatic, seamless, and sophisticated look. This is a powerful way to integrate storage, making it look like a beautiful piece of furniture or an architectural wood wall.
- The Open-Shelving Balance: MCM design is about functional display. Integrating sections of open shelving, either in matching wood or simple metal, breaks up the monotony of cabinet doors. It provides a space to display curated ceramics, glassware, and plants, adding personality and life to the room.
3.4 Tips for Integrating Mid-Century Modern Cabinets
You do not need a time-capsule home to enjoy this style. These tips for integrating mid-century modern cabinets help you blend the aesthetic into any home.
- Start with Hardware: The easiest DIY mid-century modern cabinet tutorial is to simply swap your current hardware for slim, brass bar pulls. It is a small change with a huge impact.
- Mix with Modern: Pair your wood MCM cabinets with a high-gloss, modern finish, or a sleek, stainless steel waterfall island. This “Mod-Century” blend feels fresh and current.
- Focus on the Island: If you are not ready for a full renovation, consider making just your kitchen cabinet island an MCM statement piece, with a wood-grain finish and a clean-edged countertop.
- Let Us Help: Emulating Mid-Century Modern Cabinet design is easy with our free 3D design service. We can show you exactly how to get the Mid-Century Modern Cabinet style, balancing all the elements for a perfect, cohesive look. Our Mid-Century Modern Cabinet look tutorial and consultation service takes the guesswork out of recreating Mid-Century Modern Cabinet aesthetics.
Is Your Kitchen Failing You?
Are you tired of fighting with cluttered countertops and outdated, inefficient cabinets? Do you feel stuck, unable to find a high-quality, customized storage solution that fits your unique space and your budget?
You deserve a kitchen that inspires you, not one that adds stress to your day.
The design team at rtadepot.ca is ready to solve these problems immediately. We specialize in transforming challenging layouts and limited square footage into spaces of beauty and maximum efficiency. We provide the high-end, custom-fit look you desire without the excessive cost and long waits of bespoke cabinetry.
Do not wait another day to start planning the kitchen you and your family deserve. Call our expert consultants now at +1 888 973 5636 for a free, no-obligation design consultation. Let us show you how simple it can be to achieve your dream kitchen.
4. What Is the Best Way to Assemble and Install a Kitchen Cabinet?
The best method depends on your budget and skill. Ready-to-Assemble (RTA) cabinets offer significant cost savings for those comfortable with DIY, while professional installation guarantees a fast, flawless finish, which is often recommended to protect your warranty.
One of the most significant decisions in your kitchen cabinet renovation journey is how your new kitchen cabinetry will be built and installed. At rtadepot.ca, we empower you with flexible options that put you in control of your budget and timeline. We specialize in high-quality Ready-to-Assemble (RTA) cabinets, but also provide access to professional installation services for a completely hands-off experience.
4.1 Is RTA (Ready-to-Assemble) a Good Choice?
Yes, RTA is an excellent choice. The RTA cabinet market has seen consistent growth, projected to expand significantly by 2030, because it provides high-end materials (like solid wood and plywood) and premium features (like soft-close hinges) at a fraction of the cost of custom cabinetry.
The term RTA can sometimes be misleading. Our RTA cabinets are not the low-quality particle board units you might find in a discount store. They represent a significant evolution in the industry.
- Superior Construction: Our RTA cabinets are manufactured with the same high-quality materials as many custom-built lines. This typically includes solid wood face frames and doors (often from desirable woods like Maple), plywood boxes for strength and water resistance, and premium features like soft-close hinges and full-extension dovetail drawers.
- Cost-Effectiveness: The primary benefit is cost. By shipping the cabinets flat-packed, we save significantly on shipping and labor, a savings we pass directly to you. You get a semi-custom quality kitchen for a fraction of the price.
- Sense of Accomplishment: For the homeowner who enjoys being hands-on, successfully assembling and installing your own kitchen provides a deep sense of pride and accomplishment.
4.2 Step-by-Step RTA Assembly Process
Assembling your new kitchen cabinet units is a straightforward process. Each kitchen cabinet is precision-cut, pre-drilled, and comes with all the necessary hardware. While you should always follow the specific instructions included with your model, here is a general guide to the assembly workflow.
- Preparation and Inventory: Open your boxes carefully. Lay out all pieces on a soft surface, like a blanket or cardboard, to prevent scratching. Compare the parts list with the components in the box to ensure everything is present.
- Gather Your Tools: Having the right tools makes the job simple. (See our recommended tool list below).
- Frame Construction: Start by laying one side panel flat. Apply a small bead of wood glue in the channels or dado grooves. Insert the top, bottom, and back panels into these grooves.
- Attach the Second Side: Fit the second side panel onto the assembled pieces, ensuring all panels slide into their corresponding grooves.
- Secure the Box: This is the most critical step. Use the provided L-brackets or cam-lock system to secure the kitchen cabinet box. Use a carpenter’s square to check that all four corners are at a perfect 90-degree angle. A square kitchen cabinet is essential for proper door and drawer alignment.
- Assemble Drawers: If your cabinet has drawers, assemble the four-sided dovetail box. Slide the drawer bottom into its groove, and then secure the box.
- Install Hardware: Attach the soft-close drawer glides to the cabinet frame and the drawer box. Attach the hinge plates to the cabinet frame and the hinges to the doors.
- Final Touches: Snap the hinges onto the hinge plates and install the drawer boxes. Make the final micro-adjustments to the hinge screws to ensure all your doors are perfectly aligned with even gaps.
| Recommended Assembly and Installation Tool Kit |
|---|
| Cordless Drill/Driver (with adjustable clutch) |
| Rubber Mallet (for tapping dovetails together) |
| Wood Glue |
| Carpenter’s Square |
| Tape Measure |
| Level (a 4-foot level is ideal for base cabinets) |
| Clamps (for holding cabinets together during installation) |
| Shims (for leveling base cabinets) |
| Safety Glasses |
4.3 Professional Installation: The rtadepot.ca Advantage
We understand that DIY is not for everyone in Canada. Your time is valuable, and the precision required for a perfect installation can be intimidating. That is why rtadepot.ca offers comprehensive installation services.
Choosing our professional team provides total peace of mind. Our installers are certified, insured, and masters of their craft. They will have your entire kitchen assembled and installed, often in just a day or two.
The benefits are clear:
- Speed and Efficiency: What might take you several weekends, our team can do in a fraction of the time.
- Guaranteed Perfection: They ensure every cabinet is perfectly level, plumb, and securely fastened to the wall. All doors and drawers will be aligned.
- No Errors, No Waste: They know how to handle unexpected issues, like uneven floors or walls that are not perfectly straight.
- Warranty Protection: Using a certified installer often provides an extra layer of protection for your product warranty, as it ensures the units were assembled and installed exactly to manufacturer specifications.
Ask your rtadepot.ca design consultant about adding professional installation to your kitchen cabinet order. We can bundle it into your kitchen package for a seamless, stress-free renovation.
5. Kitchen Cabinet Maintenance and Repair Guide
Your beautiful new kitchen cabinet is an investment in your home. With just a small amount of consistent care, you can protect that investment and keep your kitchen cabinetry looking and functioning like new for decades. The high-quality materials used by rtadepot.ca are selected for their durability and ease of maintenance. The key is to use gentle cleaning methods regularly and avoid harsh, abrasive products.
5.1 Daily and Weekly Cleaning Protocols
The best defense against wear and tear is a good offense. Promptly cleaning up spills, especially on wood surfaces, is the most important rule.
- Daily Wipe-Down: For daily spills (splatters, drips), simply use a soft, clean, damp microfiber cloth. Follow immediately with a soft, dry cloth to remove all residual moisture.
- Weekly Cleaning: For a more thorough cleaning to remove fingerprints or grease, use a mild, non-abrasive solution.
| Material Type | Recommended Cleaning Solution | Cautions and Notes |
|---|---|---|
| Solid Wood & Veneer | A few drops of mild dish soap (non-citrus, non-ammonia) in a gallon of warm water. | Always wipe in the direction of the wood grain. Dry immediately. Avoid oil-based soaps. |
| Painted / MDF | Same mild soap and water solution. A 50/50 solution of white vinegar and water is also effective for grease. | Be gentle. Do not scrub, as this can dull the sheen over time. Dry immediately. |
| Laminate / Thermofoil | Most all-purpose, non-abrasive household cleaners are safe. | Avoid any abrasive pads or cleaners, which can scratch the surface. |
| High-Gloss Acrylic | A very soft, non-abrasive cloth (like a high-quality microfiber) with just water or a special acrylic-safe cleaner. | These surfaces can scratch easily. Never use paper towels or all-purpose cleaners. |
| Glass Inserts | Standard glass cleaner. | Spray the cleaner onto your cloth, not directly onto the kitchen cabinet. This prevents cleaner from seeping into the wood frame. |
5.2 Long-Term Care for Lasting Beauty
Beyond daily cleaning, a few environmental factors and periodic treatments can extend the life of your kitchen fixtures.
- Humidity Control: Wood is a natural material that expands and contracts with changes in humidity. Try to maintain a stable indoor humidity level (ideally 35-50%) to prevent warping or joint-splitting.
- Avoid Direct Sunlight: Just like your skin, wood and painted finishes can fade over time with prolonged exposure to direct UV rays. Use curtains or blinds on windows that cast direct sun on your cabinets during peak hours.
- Polishing Wood (Occasionally): For wood cabinets, you can use a high-quality, non-silicone furniture polish once or twice a year to restore luster. Avoid polishes with wax or silicone, which can build up and attract dust.
5.2 Handling Common Repairs and Adjustments
Even the best cabinets will need minor adjustments over time due to normal use.
- Adjusting Soft-Close Hinges: This is the most common fix. If your doors are misaligned, look at the hinge. You will see several screws.
- Horizontal (Side-to-Side): One screw moves the door left or right.
- Vertical (Up-and-Down): Another screw (often on the mounting plate) moves the door up or down.
- Depth (In-and-Out): A third screw moves the door closer to or farther from the cabinet frame. Make small, quarter-turn adjustments until the alignment is perfect.
- Fixing Minor Scratches (Wood): For light surface scratches, a furniture touch-up marker or a wax repair pencil (in your cabinet’s stain color) can make it virtually disappear.
- Tightening Hardware: Drawer pulls and knobs can loosen. This is an easy fix. Simply open the door or drawer and tighten the screw from the inside with a screwdriver.
- Stuck Drawers: If a drawer is not gliding smoothly, first check the track for any debris. If it is clear, the drawer might be overloaded. Remove some heavy items. If it still sticks, the glide mechanism may need to be replaced.
6. Understanding Your Warranty and Return Policy
A kitchen cupboard purchase is a significant financial decision. It is what we call a YMYL (Your Money or Your Life) purchase, and we take that responsibility seriously. At rtadepot.ca, we are committed to the highest standards of E-E-A-T (Experience, Expertise, Authoritativeness, and Trustworthiness). A core part of that trust is a transparent, easy-to-understand, and robust warranty. We stand behind the craftsmanship, materials, and durability of every kitchen unit we sell.
6.1 The rtadepot.ca Quality Guarantee
Our cabinets are sourced from manufacturers who provide industry-leading warranties, often in the form of a Limited Lifetime Warranty. This guarantee protects you, the original purchaser, against defects in materials and workmanship under normal home use.
This warranty is our promise to you that your kitchen will function as beautifully as it looks. Key components covered typically include:
- Cabinet Box Integrity: Guarantees against structural failures, such as delamination of the plywood or breakage of joinery.
- Drawer and Hinge Hardware: Covers the functionality of all moving parts, including our standard soft-close hinges and full-extension drawer glides.
- Finish Durability: Warrants against peeling, bubbling, or cracking of the cabinet’s factory-applied finish.
We encourage you to speak with a rtadepot.ca consultant at +1 888 973 5636 to review the specific warranty document for the exact cabinetry style you are considering.
6.2 What Is (and Is Not) Covered?
Transparency is essential for trust. It is important to understand what a typical cabinet warranty covers, and what it does not.
- What is NOT covered: A warranty protects against manufacturing defects, not issues that arise from external factors. Common exclusions include:
- Normal Wear and Tear: Minor scratches, nicks, or dents that occur from daily use.
- Improper Installation: Issues that arise from cabinets not being installed correctly (this is why professional installation is a great choice).
- Environmental Damage: Warping or damage caused by excessive humidity (like a plumbing leak) or prolonged exposure to direct sunlight.
- Natural Wood Characteristics: Wood is a natural product. Variations in grain, color, and mineral streaks are not considered defects; they are part of its unique beauty.
- Finish Fading: The natural, subtle mellowing of wood and paint colors over time.
6.3 Navigating the Return and Claims Process
We have a 99% satisfaction rate, but in the rare event that an issue arises, we have designed our process to be simple, fast, and supportive.
- Inspect Upon Arrival: Please inspect your delivery thoroughly before you sign for it or begin assembly. If you notice any visible damage to the boxes, make a note of it with the delivery driver.
- Contact Us Immediately: If you discover a concealed issue (e.g., a defective part) after unpacking, stop assembly of that unit. Take clear photos of the issue.
- File Your Claim: Contact our customer service team by phone or visit our website at https://www.rtadepot.ca/. Provide your order number, a description of the issue, and your photos.
- Resolution: Our team will review your claim immediately. We will work quickly to provide a solution, which almost always involves shipping a replacement part or component to you at no additional cost. Our goal is to resolve your issue with minimal disruption to your project.
7. Interior Arrangement: Optimizing Your Kitchen Cabinet Layout
Installing your new kitchen cabinet units is the first half of the transformation. The second, and equally important, half is optimizing the inside of those cupboards. Modern kitchen design is about ergonomics, workflow, and intelligent organization.
A well-designed kitchen, where every item has a logical home, can significantly reduce the time you spend on prep and cleanup. Your new kitchen cabinetry from rtadepot.ca is the foundation for a truly efficient and clutter-free home.
7.1 The Evolution from Work Triangle to Kitchen Zones
For decades, designers followed the “kitchen work triangle” (the path between the sink, stove, and refrigerator). While this is still a useful concept, modern kitchens—which are often larger, have islands, and multiple cooks—are better organized by “zones.”
We design your kitchen cupboard layout based on these primary work zones:
- Prep Zone: This is where the majority of work happens. It requires ample counter space and is ideally located near the sink and the waste bin. Cabinets here should store:
- Mixing bowls
- Cutting boards (using vertical dividers)
- Knives (in a drawer insert)
- Spices and oils (in a pull-out rack)
- Cooking Zone: The area immediately surrounding your cooktop and oven.
- Base cabinets should be deep drawers to store pots and pans.
- A nearby drawer for cooking utensils (spatulas, whisks).
- A skinny pull-out cabinet for baking sheets and trays.
- Storage Zone: Your pantry and refrigerator. This is for food.
- We can design a tall pantry cabinet with pull-out shelves so you can see everything at a glance, from floor to ceiling.
- Cleaning Zone: The area around your sink and dishwasher.
- The cabinet under the sink is for cleaning supplies, sponges, and a dishrag pull-out.
- A dedicated pull-out cabinet for waste and recycling bins is a must-have.
- Dishes & Glassware Zone: This is for your everyday items. It is most logically placed near the dishwasher for easy unloading. Upper cabinets or deep drawers in an island are perfect for this.
7.2 Smart Storage Solutions for Every Cabinet
Our design consultants at rtadepot.ca are experts at integrating clever organizational systems. These are the tools that transform a standard box into a high-performance storage solution.
- For Base Cabinets:
- Deep Drawers: We cannot overstate this. Replacing standard base cabinets (with a shelf you have to kneel to reach) with 2 or 3 deep drawers is a life-changing upgrade. Perfect for pots, pans, and even small appliances, kitchen cabinet.
- Pull-Out Trays (Roll-Outs): A good alternative to drawers, these can be retrofitted into existing cabinets to bring the contents to you, kitchen cabinet.
- Pull-Out Waste/Recycling: Hides your bins inside a cabinet for a clean, seamless look, kitchen cabinet.
- For Upper Cabinets:
- Vertical Dividers: Simple plywood dividers that allow you to store cookie sheets, cutting boards, and serving platters on their side, kitchen cabinet.
- Drawer Spice Inserts: Angled inserts that lay in a shallow drawer, organizing all your spices alphabetically, kitchen cabinet.
- Pull-Down Shelves: A mechanism that allows you to pull an entire upper shelf down to counter level, perfect for shorter users or storing heavy items, kitchen cabinet.
- For Corner Cabinets:
- Lazy Susan: The classic rotating shelf system that ensures no item gets lost in the back, kitchen cabinet.
- Magic Corner / Kidney Pull-Outs: More advanced systems where a series of articulated shelves swing and pull completely out of the cabinet, giving you full access to the entire space, kitchen cabinet.
- For Tall Pantry Cabinets:
- Floor-to-Ceiling Pull-Out System: A single, tall pantry can be outfitted with a “pantry pull-out” mechanism, where the entire shelving system slides out into the room.
- Appliance Garage: A dedicated cabinet at counter height with a lift-up or tambour door, designed to hide your toaster, blender, and coffee maker.
By planning these organizational systems during the initial design phase, we ensure that your new kitchen not only looks stunning but functions flawlessly for your specific Canadian lifestyle.
Your New Kitchen is Waiting. Let’s Build It Together.
You have seen the possibilities. You understand the timeless appeal of Mid-Century Modern design, the practical steps for assembly and maintenance, and the peace of mind that comes from a rock-solid warranty. You now have a clear vision for an organized, zoned-based kitchen.
Stop letting an outdated, disorganized kitchen dictate your daily life. Stop struggling to find a custom solution that fits your unique space. The expert team at rtadepot.ca is ready to provide the professional design consultation you need, right now.
We will help you optimize your storage, elevate your home’s aesthetic, and deliver a durable, beautiful kitchen you will be proud of for decades. Your transformation is closer than you think.
Call us at +1 888 973 5636 or visit https://www.rtadepot.ca/ to schedule your free, no-obligation design consultation and 3D rendering. Your transformation in Canada starts today.

Sang Vi is a Senior Interior Designer and founder of Wedesign Interior Lab, as well as CEO of the Wedesign Interior Lab, MOC Concepts (Kitchen Cabinets), and Sang Vi Woodworking Manufacturer group. Since 2019, Sang has led an NKBA-certified team specializing in kitchen planning and cabinetry, completing dozens of projects each year across Toronto and other regions in Canada. With deep, hands-on experience in both custom millwork and ready-to-assemble (RTA) kitchen cabinets, Sang focuses on creating designs that are functional, durable, and easy to install. On this RTA platform, Sang shares practical, real-world insights to help homeowners choose, plan, and optimize their kitchen cabinet systems with confidence