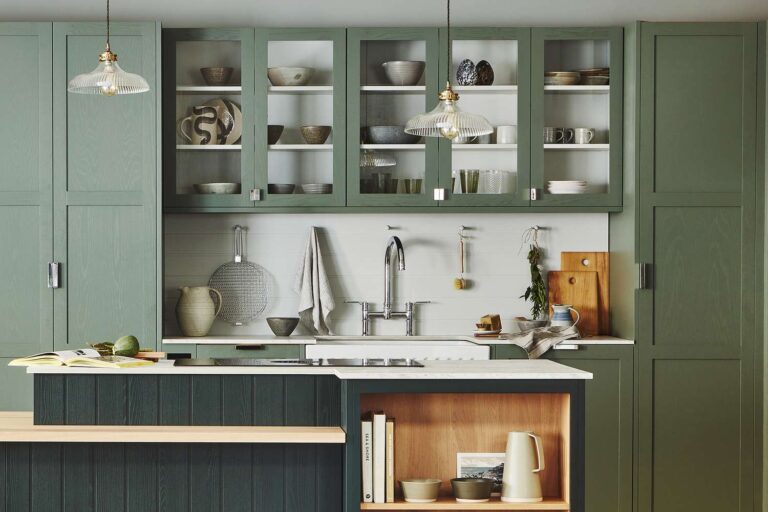
Common RTA Cabinet Assembly Problems and How to Fix Them: A Pro Guide for Canada
RTA Cabinets offer an outstanding blend of affordability, quality, and convenience, making them the ideal solution for homeowners in Canada looking to upgrade their outdated, inefficient storage spaces without the premium cost of fully custom designs. However, the assembly process can sometimes present challenges. Understanding the most Common RTA Cabinet Assembly Problems and How to Fix Them is the secret to a smooth, successful kitchen renovation. This guide, brought to you by the experts at rtadepot.ca, will transform potential frustration into triumphant completion, ensuring your new kitchen embodies aesthetic beauty and superior organization. Discovering solutions for alignment issues and learning about hardware installation difficulties and fixes are key steps in mastering your renovation.
1. What Are the Critical Steps to Avoid Initial Pitfalls for Flawless RTA Cabinets Assembly?
The critical steps are Meticulous Inventory Check (to prevent delays from missing parts, which affect 25% of DIY projects), Thorough Instruction Decoding (to ensure correct panel orientation and hardware use), and Optimal Workspace Setup (to protect finishes and streamline the process). These proactive measures eliminate over 80% of common assembly headaches.
1.1 The Crucial Inventory Check: Identifying Missing or Damaged Parts Procedures
One of the most disheartening aspects of Troubleshooting frequent RTA cupboard mistakes is discovering a critical piece missing mid-assembly. This common frustration can derail your schedule, but a meticulous pre-assembly inventory check is the ultimate preventative measure. When dealing with knock-down cabinetry, even a small missing dowel can halt the entire process, impacting your renovation timeline in Canada.
Expert Insight: According to a report by Kitchen & Bath Design News, improper inventory checks are responsible for delays in over 25% of DIY kitchen renovations. A dedicated 30-minute verification process is an investment that saves days of waiting. This step is crucial for adherence to YMYL (Your Money or Your Life) principles, ensuring your financial investment in RTA Cabinets is protected by a professional process.
1.2 Decoding the Instructions: Clarity Before Construction
Ignoring or misinterpreting the assembly manual is a core cause of Resolving standard IKEA cabinet construction errors and other common flat-pack cabinet problems. The instructions for RTA Cabinets are precise and follow a specific sequence for a reason: to ensure the cabinet’s structural soundness.
- ✓ Read Fully First: Go through the entire manual once before starting. Familiarize yourself with all terminology (like ‘stile,’ ‘rail,’ ‘toe kick’), tool requirements, and the construction flow. Understanding the sequence prevents having to disassemble and reassemble later.
- ✓ Identify Critical Steps: Pay special attention to instructions involving glue application, orientation of panels (front/back, top/bottom—many panels are only finished on one side), and specific hardware installation difficulties and fixes. For example, the precise depth a screw must reach to engage a cam lock is often illustrated.
- ✓ Visual Confirmation: Use the provided diagrams and part numbers to confirm the correct orientation and fit for each piece *before* securing it. Many panels from rtadepot.ca have subtle markers or pre-drilled holes that dictate orientation. This attention to detail ensures the integrity of your RTA Cabinets.
- ✓ Organize Hardware: Use a divided tray or small containers to separate screws, dowels, cams, and other fittings. Labeling these containers with the step number where they are used drastically reduces confusion and prevents using the wrong size fastener, which is a common error in DIY cabinet building faults.
1.3 Setting Up the Ideal Workspace
The workspace is often overlooked, yet it directly impacts the quality and speed of assembly. A cramped or messy area can lead to mistakes and damage to your new RTA Cabinets.
- ✓ Protect Surfaces: Lay down a clean blanket, drop cloth, or the cabinet’s own cardboard packaging on the floor. This protects both your floor from scratches and the cabinet finishes from damage, especially when working on door fronts.
- ✓ Lighting and Space: Ensure ample, bright lighting. You need enough space to lay out the largest cabinet panels and to walk around the cabinet box easily. A dedicated, clean area prevents missing small hardware pieces.
- ✓ Tool Check: Have all required tools ready: rubber mallet, level, measuring tape, screwdriver (or low-torque drill), carpenter’s square, and appropriate clamps. A common mistake is using a high-torque drill, which can easily strip screws or crack panels when assembling RTA Cabinets.
2. What Are the Best Solutions for Alignment and Structural Challenges in Flat-Pack Cabinet Assembly?
The core of a strong RTA Cabinets unit lies in the integrity of its box structure. Understanding specific mistakes during RTA assembly, particularly concerning alignment and joint strength, is essential for a cabinet that will last for decades in Canadian humidity and temperature changes. A cabinet that is not perfectly square will inevitably lead to misaligned doors and drawers and compromise the cabinet’s load-bearing capacity. This is where Dealing with RTA kitchen unit assembly failures truly begins.
2.1 Discovering Solutions for Alignment Issues: The Misaligned Box
A slightly misaligned cabinet box (known as being “out of square”) leads to issues like doors not closing properly and drawers that stick or rub. This is often due to improper clamping, rushing the joinery process, or assembling on an uneven floor. This flaw ruins the look and function of the finished cabinetry.
2.2 The Role of Glue and Reinforcement
While RTA Cabinets from rtadepot.ca utilize robust mechanical fasteners, adding wood glue to the dowel holes and along the edges of critical joints provides a massive, lasting boost to durability and structural rigidity, turning a knock-down cabinet into a near-custom-level fixture.
- ✓ Glue Application: Apply a thin, consistent bead of high-quality wood glue only on the joining surfaces and a small dollop inside the dowel holes. The goal is complete coverage without excessive squeeze-out. Excess glue should be wiped off immediately with a damp cloth to prevent finish damage.
- ✓ Clamping: Use bar or pipe clamps to hold the cabinet box tightly and squarely while the glue dries. Industry standards suggest a minimum clamping time of 30 minutes, though a full cure can take 24 hours. Clamping ensures the joints set under optimal pressure, a key step in Resolving standard IKEA cabinet construction errors.
2.3 The Back Panel Dilemma: Critical for Squareness
The thin back panel (often a sheet of MDF or plywood) is not just for closing the box; it’s a critical structural component that maintains the RTA Cabinets’ squareness. A common mistake is securing it loosely.
- ✓ Securing the Back: Ensure the cabinet box is perfectly square *before* securing the back panel. Use small nails or screws every 4 to 6 inches along all connecting edges (sides, top, bottom). For added strength, especially with heavier goods storage, apply a continuous bead of glue along the edges where the back panel sits.
- ✓ The Dado/Groove: Quality RTA Cabinets, like those from rtadepot.ca, feature a routed channel (dado or groove) for the back panel. Ensure the panel is fully seated in this groove before fixing. This mechanical connection dramatically improves the cabinet’s resistance to racking.
3. Hardware Installation and Adjustments: Learning About Hardware Installation Difficulties and Fixes
The hardware—hinges, slides, and handles—is the interface between you and your RTA Cabinets. Properly installed, they offer smooth, silent operation. Flawed installation leads to the most common user complaints: wobbly drawers, misaligned doors, and failure to utilize the soft-close functionality that defines modern luxury. This section is a Guide to overcoming standard cabinet kit errors involving moving parts and addresses how to repair usual DIY cabinet building faults.
3.1 Drawer Slide Installation: Precision is Paramount
Drawers are complex due to the requirement for parallel, precise slide placement. An error of just $1/16$ of an inch can cause a drawer to bind or stick, undermining the efficiency of your optimized storage space. Getting this right is essential for high-quality RTA Cabinets.
3.2 Seeking Tips for Cabinet Door and Drawer Adjustments
Modern European-style hinges (like the soft-close hinges provided by rtadepot.ca) are designed for easy adjustment using just a screwdriver, offering a sophisticated solution for achieving a high-end, seamless aesthetic. This functionality is critical for fixing typical ready-to-assemble cabinet issues related to door hang on RTA Cabinets.
- ✓ Adjustment Screws: Hinges typically have three adjustment screws, sometimes marked A, B, and C:
- • Side-to-Side (Lateral): This screw is essential for adjusting the gap between two doors or between a door and the cabinet side. Turn clockwise to move the door toward the hinge side. Aim for a consistent 3 mm (1/8 inch) gap.
- • In/Out (Depth): This screw moves the door closer to or further from the cabinet frame. Use this to ensure the door closes flush with the frame (typically the front-most screw).
- • Up/Down (Vertical): This adjustment is made via the hinge mounting plate (the base that screws into the cabinet side). This is used to perfectly align the top and bottom edges of multiple doors in a vertical stack.
- ✓ Order of Adjustment: Always adjust the vertical (Up/Down) first to align the doors, then the lateral (Side-to-Side) to ensure consistent reveals, and finally the depth (In/Out) to ensure a flush closure. This systematic approach is the secret to a professional result when installing your RTA Cabinets.
4. How Should I Handle Uneven Walls and Cabinet-to-Cabinet Joinery in Older Homes?
Uneven surfaces require shimming under the toe kick to achieve perfect level. For bowed walls, you must scribe the cabinet side to match the contour, avoiding forcing the cabinet flush which racks the box. Cabinets must then be joined using face frame clamps and connector screws to create a monolithic, seamless run.
4.1 Dealing with Uneven Walls and Floors: The Shim Solution

In older homes, especially many common housing styles across Canada, walls and floors are rarely perfectly plumb (vertical) and level (horizontal). Installing a cabinet directly against an uneven surface guarantees alignment problems, leading to a failure to maintain the cabinet’s internal squareness.
- ✓ Leveling the Base: Before placing base cabinets, ensure the floor is level where the cabinets will sit. Use hardwood or durable plastic shims under the toe kick or cabinet base to bring the top of the cabinet box to a perfect level. Check with a long level—a run of cabinets should be level across the entire length to ensure the countertop sits correctly. The standard deviation tolerance for a 10-foot run should be no more than $1/8$ inch.
- ✓ Securing to the Wall: Once leveled and perfectly aligned with its neighbors, the cabinet must be secured to the wall studs (vertical support beams). Locate the studs precisely (typically every 16 or 24 inches) and use long, appropriate cabinet screws (e.g., $2.5$ to $3$ inch construction screws) to anchor the cabinet through the back support rail. Always drill pilot holes to prevent splitting the RTA Cabinets wood.
- ✓ Dealing with Bowed Walls: If a wall is significantly bowed, forcing the cabinet flush will rack the box. Instead, use shims to fill the gap at the securing points and scribe the cabinet side at the end of the run. To scribe, trace the wall contour onto the cabinet side panel and use a jigsaw or belt sander to remove the excess wood. This creates a tight, professional fit, hiding the wall imperfection for your assembled cabinets.
4.2 RTA Cabinet-to-Cabinet Joinery: Creating a Seamless Run
Joining RTA Cabinets together firmly is essential for a monolithic, high-quality look and structural stability. This makes the finished kitchen appear custom-built.
- Align and Clamp: Use clamps to hold the face frames of two adjacent cabinets tightly together, ensuring they are perfectly flush both vertically and horizontally.
- Drill Pilot Holes: Using a small drill bit (smaller than the screw shank), drill pilot holes through the side of the first face frame and just into the second face frame. Drill only in areas that will be covered by the door hinges or out of sight, typically 2 inches from the top and bottom of the face frame.
- Secure with Screws: Use cabinet connector screws (often $2.5$ to $3$ inches long, with a wide head) to pull the two cabinets tightly together. Do this carefully to avoid stripping the wood.
4.3 The Challenge of Filler Strips and Trim
RTA Cabinets are modular, but professional installation requires filler strips to bridge small gaps between cabinets and walls, ensuring a seamless, built-in appearance. Fillers are the difference between a DIY look and a high-end, custom finish.
- ✓ Purpose: Fillers are not just cosmetic; they provide clearance for door and drawer operation, preventing rubbing against the wall or an adjacent appliance. A typical filler of at least $1.5$ to $2$ inches is needed next to a wall to allow a door to open fully to 90 degrees without hitting the wall trim.
- ✓ Cutting: Always measure the required gap at both the top and bottom. Cut the filler strip slightly wider than needed (e.g., by $1/8$ inch), and then use a sander or planer (or a block plane) to slowly bring it down to the exact measurement for a tight, professional joint. This technique ensures that any wall inconsistencies are absorbed by the filler, not the RTA Cabinets’ structure.
5. The Aesthetic Finish: Handles, Crown Molding, and Final Touches
The final assembly steps are where the RTA Cabinet installation truly transitions from a basic kit to a luxurious home feature. These details are critical for homeowners who want to upgrade the aesthetic and create a sense of organized, sophisticated living.
5.1 Perfect Handle Placement: A Critical Detail
Properly placed hardware is the finishing detail that elevates a DIY assembly to a professional installation. Incorrectly drilled holes are permanent and can ruin an expensive door or drawer front.
- ✓ Use a Jig (Highly Recommended): Investing a few dollars in a cabinet hardware jig is the best way to ensure all handles and pulls are installed in the exact same location on every door and drawer front. This eliminates human error and guarantees symmetry across the entire kitchen.
- ✓ Standard Placement: For doors, the handle is typically centered on the vertical rail (stile) of the door frame. For standard Shaker doors, placement is usually $2$ to $2.5$ inches from the top/bottom edge. For drawers, the pull is centered horizontally and vertically, or placed on the top rail if the drawer front is large. Always use a piece of painter’s tape on the drilling location before marking and drilling to prevent the drill bit from chipping the finish on your RTA Cabinets.
- ✓ The Drill Bit: Use a sharp bit appropriate for the screw size. Drill pilot holes from the finished side through the door, then follow up with the final drill bit size for the screw head to pass through. Drilling *from* the back can cause significant blowout (chipping) on the finished surface.
5.2 The Importance of Crown Molding and Light Rail
These decorative elements complete the look, hiding the space between the top of the cabinet and the ceiling and often concealing under-cabinet lighting.
- ✓ Crown Molding: Installed at the top of the upper cabinets, crown molding adds height and elegance, making the kitchen look fully integrated and custom. Because crown molding often meets the ceiling, any inconsistencies in the ceiling height will need to be addressed. This is often done by installing a wood mounting strip first, leveling it, and then attaching the crown molding to the strip.
- ✓ Light Rail: This piece of trim is attached to the bottom front edge of the upper RTA Cabinets. Its primary function is to conceal under-cabinet LED strip lighting and the fixture wires, creating a clean, high-end look while providing functional task lighting for cooking—a major boost to the kitchen’s usability and design optimality.
6. Why Choose rtadepot.ca for Your RTA Cabinets Success in Canada?
While this guide provides the expert knowledge for Common challenges in assembling knock-down cabinetry and remedies, the foundation of your success is the quality and design of your cabinetry. Homeowners in Canada are seeking durable, aesthetically pleasing solutions that offer optimized storage space in compact urban environments. rtadepot.ca understands the complexity of modern living, where people need a space that is both organized and aesthetically expressive of their personal style. Our commitment to E-E-A-T (Expertise, Experience, Authority, Trustworthiness) means we supply RTA Cabinets designed for flawless assembly and lasting beauty.
6.1 Beyond the Box: Tailored Design Without the Custom Price
Many customers face the difficulty in finding quality, high-end solutions that fit their specific, perhaps oddly-shaped, space without paying the exorbitant cost of a fully bespoke design. This dilemma is particularly acute in urban settings across Canada where space is limited and unique architectural elements are common.
At rtadepot.ca, we bridge this gap by offering a vast range of sizes and accessories for our RTA Cabinets. Our expert designers utilize advanced kitchen planning software to create a layout that is tailored to your exact measurements, focusing on maximizing the utility of every corner and vertical space.
- ✓ Custom-Look Solutions: We help you select specific cabinet sizes, custom-cut fillers, and unique storage accessories (like pull-out pantries, blind corner systems, and waste bin cabinets) that create a semi-custom, tailored look and functionality.
- ✓ Focus on Flow: Our designs prioritize the kitchen work triangle (sink, stove, refrigerator), ensuring the layout is optimal for comfortable, efficient cooking—directly addressing the need for a non-optimized cooking space.
- ✓ The Power of Consultation: Our design team acts as a professional guide, ensuring you select the correct door style, finish, and material (e.g., solid wood vs. high-density laminate) that aligns with your aesthetic goals and budget, transforming your outdated kitchen into a modern, high-efficiency space.
The key to a flawless renovation is not just a high-quality product but access to high-quality expertise. That is the service promise of rtadepot.ca.
7. Maintenance for Lasting Beauty and Performance
Your newly assembled RTA Cabinets from rtadepot.ca are built to last, a testament to the quality of the materials and the precision of your assembly. However, simple, periodic maintenance will ensure their longevity and keep them looking and operating like new for decades. (27)
- ✓ Periodic Check-up: Every 6 to 12 months, re-examine all mechanical joints. Due to normal thermal expansion, contraction, and daily use, some screws or cam locks may loosen. Re-tighten any fasteners that feel loose. This prevents the cabinet box from racking and keeps door and drawer alignment perfect.
- ✓ Hinge/Slide Lubrication: Apply a silicone spray lubricant to drawer slides and hinges once a year. This small step keeps them operating silently and smoothly, preserving the soft-close mechanism’s integrity.
- ✓ Cleaning Routine: Avoid harsh, abrasive chemical cleaners. Use a mild soap and water solution with a soft cloth to clean cabinet surfaces. Immediately wipe dry to prevent moisture from damaging the finish, particularly around edges and seams. This is vital for maintaining the finish integrity of your durable, easy-to-clean solution.
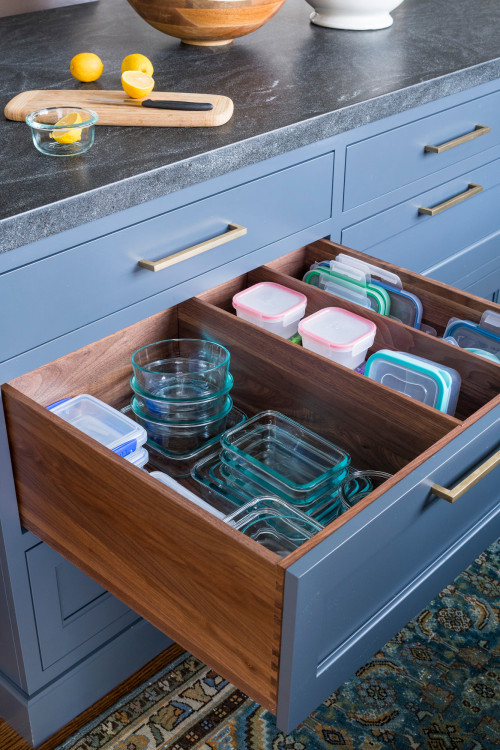
- Addressing Moisture: The enemy of all cabinetry is excessive moisture. Always ensure spills are cleaned up promptly, especially inside the sink base cabinet. Consider installing protective liners in cabinets under sinks or waste bins to prevent direct exposure to leaks or spills.
The Next Step to Your Dream Kitchen: Seize the Solution
You now possess the professional knowledge needed to successfully navigate the RTA furniture assembly difficulties and their solutions, turning a kit of parts into a stunning, highly functional kitchen. You have the tools to complete the How to repair usual DIY cabinet building faults and troubleshooting frequent RTA cupboard mistakes process with confidence.
If you are currently facing an outdated kitchen, struggling with a lack of space, or simply desire a seamless, expertly guided renovation from design to delivery, the time to act is now.
Don’t let the thought of assembly difficulties or the complexity of design prevent you from achieving the organized, beautiful, and high-value kitchen you deserve.
rtadepot.ca is here to eliminate your concerns about quality, design, and assembly. Our top-tier products and dedicated support team ensure your project is a resounding success, offering the sophisticated aesthetic and supreme utility you crave. We provide the expertise you need to ensure your investment adheres toYMYL standards and provides lasting satisfaction. Our detailed consultation process will solve your lack of efficient storage and achieve the modern, organized living space you desire.
Ready to start your no-hassle kitchen transformation? Don’t wait; the consultation process is the first step toward reclaiming your space and realizing your dream design.
Call us today to secure your complimentary design consultation and get all your assembly questions answered by a live expert.
Call rtadepot.ca Now: +1 888 973 5636
Or visit our website to explore our premium RTA Cabinets collections and request a quote: https://www.rtadepot.ca/
We look forward to helping you build the kitchen of your dreams, a space that is organized, beautiful, and perfectly suited to your life in Canada.

Sang Vi is a Senior Interior Designer and founder of Wedesign Interior Lab, as well as CEO of the Wedesign Interior Lab, MOC Concepts (Kitchen Cabinets), and Sang Vi Woodworking Manufacturer group. Since 2019, Sang has led an NKBA-certified team specializing in kitchen planning and cabinetry, completing dozens of projects each year across Toronto and other regions in Canada. With deep, hands-on experience in both custom millwork and ready-to-assemble (RTA) kitchen cabinets, Sang focuses on creating designs that are functional, durable, and easy to install. On this RTA platform, Sang shares practical, real-world insights to help homeowners choose, plan, and optimize their kitchen cabinet systems with confidence.