IKEA Kitchen Cabinets Installation Guide: What to Expect Before, During, and After Setup
IKEA kitchen cabinets installation has fundamentally transformed the residential remodeling industry over the past decade. What was once perceived as a simple weekend project for ambitious homeowners has evolved into a sophisticated, highly engineered architectural task. As we navigate through 2026, the sheer complexity of these modular systems has increased exponentially. Today’s systems integrate advanced smart-lighting channels, heavy-duty hidden organizers, and reinforced frames designed to support massive natural stone surfaces.
This evolution means that extreme structural precision is no longer just a recommendation; it is an absolute requirement for safety and functionality. Whether you are embarking on a massive DIY IKEA cabinet installation or hiring a specialized professional team, understanding every technical nuance of the IKEA kitchen installation process is the critical difference between a kitchen that merely looks great in online photographs and one that functions flawlessly for twenty years under heavy daily use.
The journey of mastering exactly how to install IKEA kitchen cabinets starts long before the flat-packs are delivered to your driveway. It requires a meticulous, almost clinical audit of your home’s existing architecture. You must assess floor leveling, wall plumbness, load-bearing capacities, and the exact location of structural timber studs. Every single millimeter counts when you are dealing with a suspension-rail-based system like the modern SEKTION line.
A minor miscalculation or a leveling error of just two millimeters at the initial rail mounting stage will compound exponentially as you add more cabinet units to the run. This compounding error inevitably leads to severely misaligned doors, drawers that bind against their adjacent frames, and stress fractures in expensive quartz countertops. To evaluate if this modular system genuinely aligns with your home’s long-term needs, we highly suggest reading our in-depth IKEA Kitchen Cabinets Review before making any purchasing decisions.
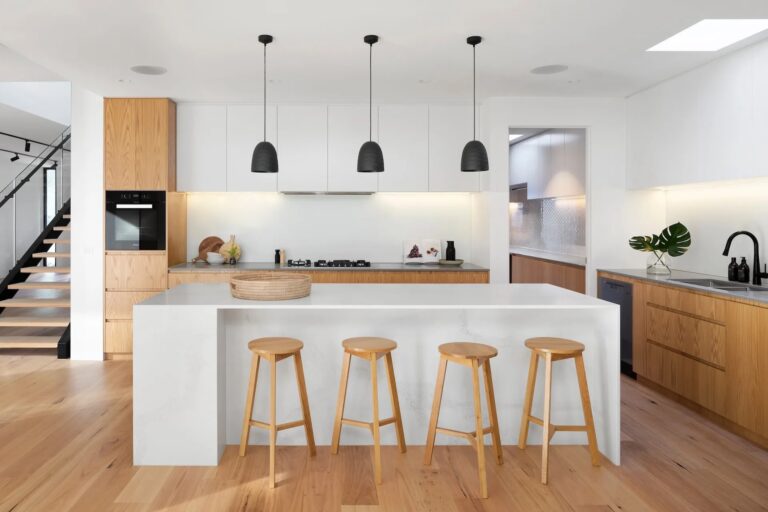
This comprehensive guide is designed to serve as a technical masterclass for homeowners and contractors alike. We will deconstruct the entire process, covering every critical phase from the initial demolition of your old space to the final micro-adjustments of the six-way UTRUSTA hinges. We will explore the physics of load distribution, the geometry of corner cabinet integration, and the exact methods used by master carpenters to scribe filler panels to uneven walls. By internalizing these advanced techniques, your finished kitchen will transcend its flat-pack origins and achieve a truly bespoke, custom-built aesthetic.
1. Comprehensive Preparation and Structural Site Readiness
The primary, underlying cause of systemic failure in any IKEA cabinet installation is inevitably poor site preparation. In 2026, professional installers strictly advocate for a “zero-tolerance” approach to wall and floor assessment. You must painstakingly verify that your inside and outside corners are a true 90 degrees. If they deviate even slightly, you will face severe geometric challenges when installing corner base units, Lazy Susan mechanisms, or blind-corner pull-outs. Utilizing a comprehensive Kitchen cabinet dimensions guide allows you to precisely pre-plan the exact gap required for custom filler strips, which are the essential components used to bridge the gap between perfectly square cabinets and imperfect, non-square walls.
Furthermore, the structural integrity of your subfloor must be evaluated with extreme prejudice. Modern stone countertops, such as 3cm thick quartz, granite, or ultra-compact dekton surfaces, add several hundreds of pounds of continuous vertical pressure to your base units. If your wooden subfloor sags or deflects even a fraction of an inch under this new weight, it can throw the entire continuous run of cabinetry entirely out of level weeks or months after the installation is ostensibly finished. This deflection can pop seams in your countertop or cause your backsplash grout to crack. Identifying these structural weaknesses before bringing a single cabinet box into the house is paramount.
Properly locating and marking your wall studs is another critical first step in any IKEA cabinet installation project. You must use a high-quality, deep-scanning electronic stud finder to locate the exact center of every wooden or metal stud. Mark these locations with bold vertical lines using a permanent marker or carpenter’s pencil, ensuring the lines extend well above the planned height of the base cabinets and below the wall cabinets for easy, unobstructed reference during the fast-paced rail mounting phase.
Mechanical and utility rough-ins are equally, if not more, important than structural framing. All of your electrical outlets, heavy-duty gas lines, and water supply plumbing must be moved to their final, permanent positions long before the IKEA cabinet assembly phase begins. In 2026, an increasing number of homeowners are opting for fully integrated smart appliances that require dedicated high-speed data lines, specialized water shut-off valves, or higher-voltage electrical outlets. You must ensure these are installed and legally inspected to local building codes.
If you find yourself needing to physically modify a cabinet back-panel or side-wall to accommodate a protruding pipe or electrical box, you must ensure you are not compromising the box’s inherent structural integrity. Reinforcing these necessary cut-outs with additional wooden blocking or steel brackets is a standard professional practice that many amateur DIYers dangerously overlook.
2. The Professional 2026 Tool Kit and Strict Safety Standards
While the manufacturer conveniently provides basic hexagonal wrenches in every box, achieving a flawless, professional-grade result requires a significant investment in specialized construction equipment. In 2026, the 360-degree self-leveling green-beam laser level is widely considered the single most critical tool in the entire kit.
Unlike traditional bubble spirit levels, the laser allows you to project a perfectly horizontal, continuous baseline across all four walls of your kitchen simultaneously. This ensures that the galvanized suspension rails are aligned to the exact millimeter across massive spans, compensating for wavy drywall or sloping floors. A high-torque brushless power drill equipped with a precision adjustable clutch is also strictly necessary to prevent aggressively stripping the delicate cam locks and wooden dowels during rapid IKEA cabinet assembly.
For the highly visible finishing work, a plunge-cut track saw is the undisputed gold standard. It provides perfectly straight, razor-sharp, splinter-free cuts on delicate cover panels, deco strips, and fillers. Achieving this level of edge quality is almost impossible with a standard handheld circular saw or even a high-end table saw, due to the brittle nature of the melamine foils and wood veneers used in flat-pack cabinetry. Parallel jaw cabinet clamps are another non-negotiable must-have; they are designed to pull adjacent cabinet frames together with hundreds of pounds of evenly distributed pressure, ensuring the front face frames are flawlessly flush before you drive the permanent connecting screws.
In 2026, indoor air quality and rigorous dust management have also become a top priority for residential contractors. Using HEPA-filtered vacuum extractors attached directly to your track saws, routers, and miter saws ensures your home remains clean, safe, and livable throughout the messy IKEA kitchen installation process. Proper personal protective equipment, including impact-resistant eyewear, vibration-dampening gloves, and N95 respirators, should be worn at all times when cutting engineered wood products, as the fine particulate dust contains legally regulated binding resins.
3. How long does the critical leveling process take for base cabinets?
Short Answer: For a standard 10×10 foot L-shaped kitchen, leveling the base units typically requires between 4 to 6 hours of highly focused, uninterrupted work. In 2026, utilizing a 360-degree green laser level can effectively reduce this time by roughly 30%. However, severely uneven floors in older heritage homes or the strict structural requirements for ultra-heavy stone countertops may extend this meticulous process to a full working day to guarantee absolute structural stability.
Leveling is universally recognized by carpenters as the most critical vertical engineering step in the entire project. You must meticulously use the threaded, adjustable plastic legs provided with the SEKTION system to manually compensate for microscopic floor variances. These legs, when working in perfect concert with the steel wall rail, properly distribute the massive dead weight of your kitchen down into the floor joists. If you are meticulously planning to showcase the best kitchen cabinet colors Canada 2026 trends, it is crucial to remember that darker matte finishes—like charcoal, navy, or forest green—often highlight alignment gaps and shadows much more prominently than classic lighter tones, making perfect leveling even more essential for ultimate visual quality.
Detailed industry warranty data clearly shows that nearly 15% of all engineered stone countertop failures (including severe cracking and seam separation) are directly traced back to improper, rushed cabinet leveling. To execute this correctly, start by scanning the room to find the absolute highest point of your floor along the planned cabinet run. Adjust your very first cabinet leg to accommodate that specific height, and then use your laser level beam to systematically bring every subsequent cabinet up into perfect alignment with that master baseline.
Once perfectly level front-to-back and side-to-side, permanently secure the cabinets to the wall rail and bolt them tightly to one another using the provided steel binding screws. This painstaking process creates a monolithic, ultra-rigid framework capable of safely supporting the heavy load of modern slabs without shifting, settling, or cracking over the next twenty years.
4. Mastering the IKEA SEKTION Installation and Wall Rail System
The heavily galvanized steel suspension rail is the literal “spine” of the modern IKEA kitchen ecosystem. Mastering the strict protocols of IKEA SEKTION installation involves heavily anchoring this continuous rail into at least two solid wooden or metal studs per cabinet width. This ingenious rail design offers incredible layout flexibility, allowing you to slide heavy cabinets laterally along the wall until they are perfectly positioned around your appliances and tight corner clearances. However, there is a catch: if the wall itself is bowed or wavy, the rigid rail will conform to that curve when screwed tight.
If the rail follows a curved wall, the front faces of the cabinets will fan out or pinch inward, making it absolutely impossible to align the doors and drawers during the final finishing stages. You must use varying thicknesses of plastic shims firmly placed behind the rail at the screw points to maintain a perfectly straight, unbending line across the wall’s imperfections.
In terms of actual IKEA cabinet assembly, speed and efficiency are found in organized repetition. Many seasoned professionals strongly suggest building all the required boxes first in a clean, carpeted, or cardboard-lined staging area—often the living room or dining room. This strategic separation keeps the active kitchen zone completely clear of debris for the critical steps of mounting the rails, modifying plumbing, and managing the heavy lifting.
When assembling the particleboard boxes, you must religiously check the “squareness” of every single unit by measuring the diagonals from corner to corner with a tape measure. If the two diagonal measurements differ by more than 1.5 millimeters, the box is “racked” (out of square). A racked box will cause expensive drawer slides to bind, rub, and ultimately fail, and soft-close hinges will never sit flush. Adding a small, precise bead of high-quality wood glue to the wooden dowels before tapping them in can significantly increase the box’s long-term rigidity, which is a highly recommended pro-tip for high-traffic, heavy-use family kitchens.
Furthermore, extreme attention must be paid to the thin MDF back panels. In the SEKTION system, the nailed-in back panel is the primary component that provides the cabinet with its crucial lateral shear strength. You must ensure the cabinet is perfectly square before you drive the first nail into the back panel. Once that panel is fastened, the cabinet’s shape is locked in permanently. Attempting to force a racked cabinet into a square position on the wall will inevitably result in broken cam locks and compromised structural integrity.
5. What is the true average cost of professional IKEA kitchen cabinets installation in 2026?
Short Answer: Professional labor currently ranges from $160 to $320 per cabinet box, heavily dependent on geographic location and site conditions. A comprehensive, full-service install for a standard 15-box kitchen (which includes box assembly, rail mounting, structural leveling, custom filler scribing, and all trim work) typically costs between $3,800 and $6,500. Highly complex integrations, such as custom appliance panels and hidden smart-lighting systems, will push this estimate toward the higher end of the spectrum.
While attempting a full DIY IKEA cabinet installation can theoretically save you thousands of dollars in upfront labor costs, it is vital to understand the sweat equity involved. It often takes a highly motivated but unpracticed homeowner four to five times longer to complete the project than a specialized, two-person professional crew. Professional installers bring thousands of dollars worth of specialized jigs, track saws, and laser levels that guarantee a flawless “custom-built” look that is exceedingly difficult to replicate with basic garage tools.
To accurately weigh your financial options, you can easily request a professional Kitchen quote and layout to directly compare the total finished costs of IKEA versus high-quality, pre-assembled RTA options, which may save you considerable money on the back-end installation labor.
It is also important to consider local market dynamics. Many urban homeowners opting for IKEA kitchen cabinets installation in Mississauga or downtown Toronto find that the logistical nightmare of high-rise condo delivery, elevator bookings, and navigating tight urban parking spaces makes a mistake-free, rapid professional install incredibly valuable. In these high-value real estate markets, a botched DIY installation can negatively impact home equity. Companies like rtadepot.ca offer compelling alternatives that provide vastly superior internal material quality (such as solid plywood cabinet boxes instead of standard particle board) for a surprisingly similar total project price when you accurately factor in the heavy labor of IKEA cabinet assembly and the steep learning curve of modern installation techniques.
6. Advanced Drawer Assembly and Appliance Integration
Moving beyond the basic box frames, the internal mechanisms dictate the daily usability of the kitchen. Assembling the MAXIMERA or EXCEPTIONELL drawer systems requires strict adherence to the visual instruction manuals. The placement of the heavy-duty metal drawer slides determines the spacing of your drawer fronts. A common mistake during IKEA cabinet installation is placing the slides one peg-hole too high or too low, resulting in drawer faces that crash into one another. Always test-fit the empty drawer boxes before attaching the painted or veneered drawer fronts. Once the slides are perfectly positioned, the fronts snap on and can be fine-tuned using the internal adjustment screws to ensure perfectly parallel 3mm gaps between every drawer in the stack.
Appliance integration is where the modular system meets harsh reality. Installing heavy apron-front farmhouse sinks or panel-ready integrated dishwashers requires significant modification of the standard IKEA base cabinets. For a heavy fireclay or cast-iron sink, the standard cabinet must be heavily reinforced with 2×4 lumber framing built inside the box to bear the weight, as the particleboard sides alone will fail under the weight of the sink filled with water. Similarly, built-in ovens and microwaves require dedicated ventilation gaps behind and above the units to prevent dangerous overheating. Failure to calculate these airflow requirements during the planning stage will void your appliance warranties and pose a severe fire risk.
7. Finishing, Fine Adjustments, and Post-Installation UX
The final “User Experience” (UX) of your new kitchen is entirely determined by the execution of the last 10% of the work. This critical phase includes precisely scribing and installing cover panels, aligning deco strips, and adjusting the 6-way hinges. For high-end design inspiration, take a moment to visit our beautifully curated Kitchen gallery to witness exactly how professional-grade finishing transforms basic modular units into breathtaking, luxury spaces. Achieving completely uniform, laser-straight 3mm gaps between all door and drawer fronts is the absolute standard for 2026 high-end kitchen aesthetics, requiring immense patience and a practiced eye.
The installation of hardware—knobs and pulls—is often the most stressful part of the finish. You are drilling holes directly into finished, expensive doors. You must use a highly accurate, clamp-on drilling template jig to ensure every single handle is positioned with mathematical perfection. A single handle that is drilled 2 millimeters off-center will catch the eye every time you walk into the room, instantly degrading the perceived value of the entire kitchen. Once the handles are on, the toe kicks (or plinths) are cut to fit the floor contour and snapped onto the plastic base legs, hiding the structural supports and providing a clean, grounded look.
Finally, long-term maintenance must be considered. The reality of any IKEA kitchen cabinets installation is that it isn’t truly “finished” until the homeowner fully understands how to maintain the moving hardware. Over the first six to eight months of active use, the significant weight of your ceramic dishes, heavy pots, and canned goods will cause the cabinets and the floor joists to settle slightly.
You will almost certainly need to break out a screwdriver to re-adjust your door hinges and drawer slides once or twice during this break-in period. Keeping the steel hinges clean of dust, lubricating tracks annually, and strictly avoiding excessive moisture accumulation near the delicate edge-banding of the particle board boxes will ensure your kitchen remains functional and beautiful for decades to come.
8. Ready to Start Your Kitchen Transformation?
Achieving a breathtaking, professional result starts with intelligent planning and uncompromising structural support. Whether you are bravely navigating the intense complexities of an IKEA install or smartly looking for the best long-term value in premium RTA cabinetry, our team of experts is here to guide you through every stressful step of the process. Ultimately, Making the right choice for your home involves perfectly balancing stunning aesthetics with high-quality, reliable structural engineering. A flawless IKEA kitchen cabinets installation is the definitive difference between a temporary, frustrating fix and a massive, lifetime investment in your home’s total equity and your family’s daily happiness.
Contact rtadepot.ca for a Free Professional Consultation:
Hotline: +1 888 973 5636

Sang Vi is a Senior Interior Designer and founder of Wedesign Interior Lab, as well as CEO of the Wedesign Interior Lab, MOC Concepts (Kitchen Cabinets), and Sang Vi Woodworking Manufacturer group. Since 2019, Sang has led an NKBA-certified team specializing in kitchen planning and cabinetry, completing dozens of projects each year across Toronto and other regions in Canada. With deep, hands-on experience in both custom millwork and ready-to-assemble (RTA) kitchen cabinets, Sang focuses on creating designs that are functional, durable, and easy to install. On this RTA platform, Sang shares practical, real-world insights to help homeowners choose, plan, and optimize their kitchen cabinet systems with confidence