
Most cabinet installation failures begin before the final screws are driven. An incorrect room measurement, missed floor high point, unsuitable fastening location or forgotten filler can affect the entire cabinet run, even when every cabinet box was assembled correctly.
This guide identifies seven common RTA cabinet installation mistakes, explains the warning signs and shows what to verify before continuing. It is a prevention checklist—not a replacement for the cabinet instructions or the complete installation sequence.
For the full workflow from site preparation through final adjustment, use the pantry cabinet installation guide. This article focuses only on the decisions that commonly create avoidable rework.
Quick Answer: What Are the Most Common RTA Cabinet Installation Mistakes?
The seven common mistakes are skipping final measurements, starting without finding the floor high point, fastening cabinets before the run is aligned, using unsuitable structural support, forcing cabinets against uneven surfaces, forgetting fillers and appliance clearances, and adjusting doors before the cabinets are level and secure.
The Seven Installation Mistakes at a Glance
- Starting without verifying measurements and specifications
- Ignoring the floor high point and level reference
- Fastening cabinets before the run is aligned
- Using unsuitable fasteners or support
- Forcing cabinets against uneven floors or walls
- Forgetting fillers, door swing and appliance clearance
- Adjusting doors and drawers too early
Assembly or installation? A reversed panel, failed connector or out-of-square cabinet box is an assembly issue. A cabinet that becomes unlevel, misaligned or unstable after placement is an installation issue. Use the RTA cabinet assembly problems and fixes guide when the defect exists before the cabinet enters the layout.
Mistake 1: Starting Without Verifying Measurements and Specifications
A cabinet plan should be checked against the actual room, the delivered cabinet codes and the final appliance specifications before installation begins. Relying on an early sketch or a single wall measurement can leave too little space for fillers, trim, services or appliance movement.
Warning Signs
- ✓The delivered cabinet codes have not been matched to the layout.
- ✓Only one ceiling height or wall width was recorded.
- ✓Appliance model numbers and manufacturer clearances are unavailable.
- ✓Plumbing, outlets, vents or switches conflict with the proposed cabinet position.
Prevent It
Verify the room at multiple points and compare the smallest usable opening with the actual cabinet dimensions. Mark fixed obstructions, service locations, finished-floor conditions, door swing and the space allocated to fillers. Use the dedicated checklist for what to measure before installing a pantry cabinet.
Do not replace appliance specifications with a generic opening. Confirm the exact model’s installation, ventilation and door-clearance requirements before locking the cabinet run into position.
Mistake 2: Ignoring the Floor High Point and Level Reference
Beginning at an arbitrary corner can make the rest of the cabinet run difficult to level. If the floor rises farther along the wall, cabinets already set at the low point may conflict with the intended countertop or appliance height.
Establish a reliable level reference across the run and work from the high point using the cabinet system’s approved legs or shimming method. Recheck after every meaningful adjustment; one cabinet should not be forced to follow an uneven floor.
Mistake 3: Fastening Cabinets Before the Run Is Aligned
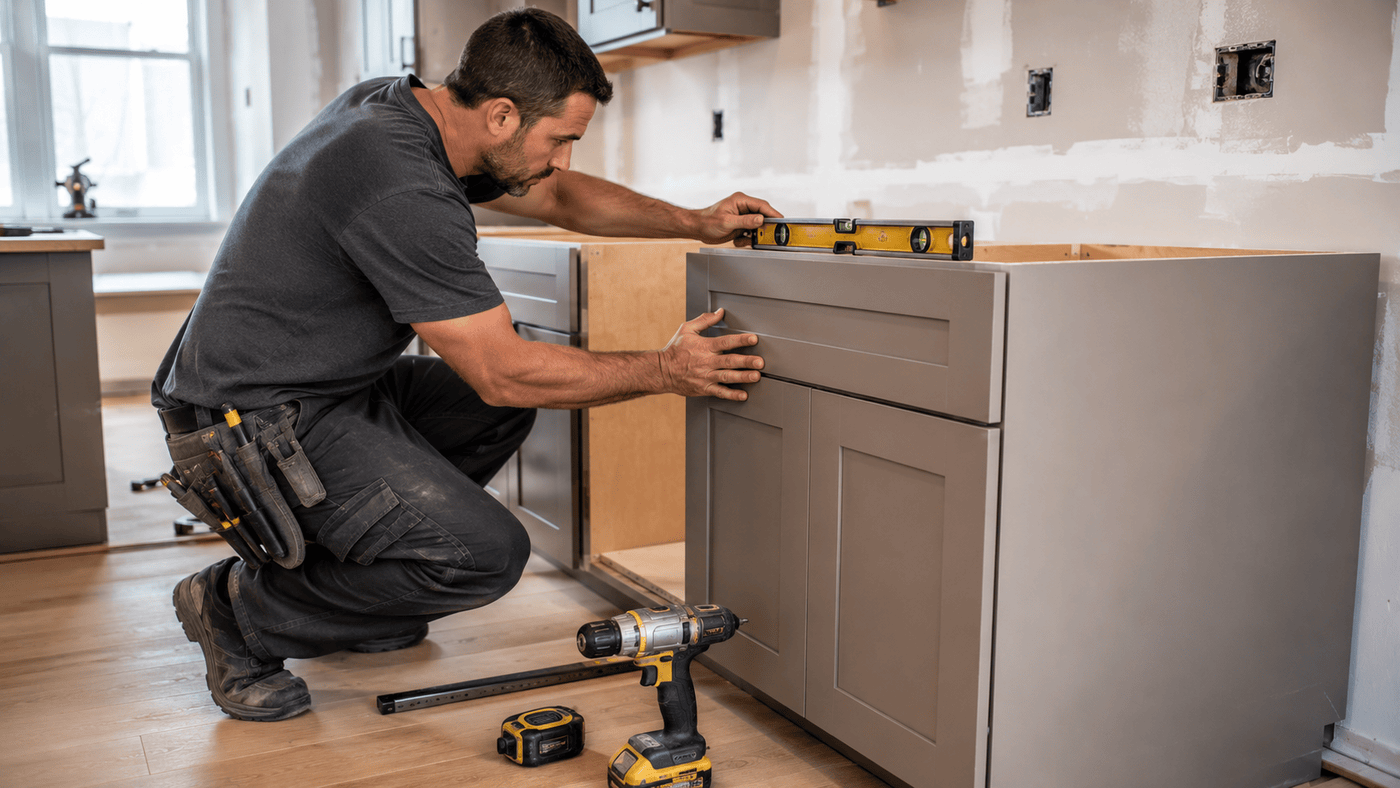
Fastening the first cabinet immediately can lock an error into the entire layout. Before final wall or cabinet-to-cabinet connections, the installer should confirm the face line, level, plumb, depth, fillers and appliance openings across the relevant run.
Use a Position–Check–Fasten Sequence
- Place the cabinet at its layout position without final fastening.
- Level and plumb the cabinet without twisting the box.
- Position adjacent cabinets, panels and planned fillers.
- Clamp protected cabinet faces or sides into alignment where appropriate.
- Recheck the appliance opening and overall run dimensions.
- Fasten only after the complete check passes.
Do not use fasteners as alignment tools: A screw should secure a correctly positioned cabinet. It should not be used to pull a twisted cabinet box, bowed wall or misaligned face into place.
Mistake 4: Using Unsuitable Fasteners or Structural Support
Cabinets must be secured through the mounting area specified by the cabinet system and into support suitable for the actual wall construction. Drywall by itself should not be treated as structural support for a loaded wall cabinet or tall pantry cabinet.
Wood framing, steel framing, masonry and walls with added blocking can require different fasteners and installation methods. A stud finder can support the investigation, but it does not prove the wall is free of pipes, wiring or other concealed services.
Prevent It
- ✓Identify the wall construction and suitable support before positioning the cabinet.
- ✓Use the mounting rail, bracket or reinforced cabinet area specified by the manufacturer.
- ✓Select fasteners for the wall system, cabinet load and required connection.
- ✓Stop and use a qualified installer or appropriate trade when support or concealed services are uncertain.
Tall-cabinet warning: Level and secure a pantry cabinet using the approved mounting method before loading shelves or completing final door adjustment. Follow the product instructions and site-specific fastening requirements.
Mistake 5: Forcing Cabinets Against Uneven Floors or Walls
A bowed wall or sloped floor should be corrected at the support, shim, filler or scribed-finish interface—not by twisting the cabinet. Pulling a cabinet tightly against an uneven surface can change its diagonals, create door gaps and move the face out of alignment with adjacent units.
The corrective methods belong in the dedicated guide to install cabinets on uneven floors and walls. This article intentionally keeps the section to a prevention check so the two pages do not compete for the same search intent.
Mistake 6: Forgetting Fillers, Door Swing and Appliance Clearance
A cabinet can fit physically and still fail functionally. Doors, handles, drawers and appliances require working clearance, while fillers provide adjustment space beside walls, tall panels and other fixed surfaces.
Cabinet-size references are useful for planning, but they do not replace the delivered product specification or appliance manual. Use the standard kitchen cabinet dimensions guide as a planning reference, then verify the actual products.
Mistake 7: Adjusting Doors and Drawers Too Early
Final door and drawer alignment should happen after the cabinet boxes are assembled square, positioned, leveled, connected and secured. Adjusting reveals earlier can waste time because the gaps may change as the boxes move during installation.
Correct Adjustment Order
- Confirm the cabinet box is square and undamaged.
- Position the cabinet in the final layout.
- Level, plumb and align the cabinet run.
- Complete the approved cabinet connections and wall fastening.
- Recheck the cabinet box and operating clearances.
- Adjust hinges, door gaps, drawer fronts and soft-close components last.
If a door or drawer still binds after the cabinet is level and secure, determine whether the problem comes from the assembly, hardware installation or cabinet alignment before making repeated adjustments.
Pre-Fastening Cabinet Installation Checklist
Complete this check before final wall fastening, countertop templating or loading cabinets.
- □Cabinet codes match the final layout.
- □Room, cabinet, filler and appliance measurements have been verified.
- □The floor high point and level reference are established.
- □Each cabinet is level, plumb, square and aligned without being twisted.
- □Suitable structural support, mounting areas and fasteners are confirmed.
- □Fillers, finished panels and scribed pieces are included in the run dimensions.
- □Doors, drawers, handles and appliances have functional clearance.
- □Final hinge and drawer-front adjustment will be completed after fastening.
Plan the Cabinet Run Before Installation Day
Confirm cabinet sizing, appliance specifications, fillers and layout conditions before installation begins. Browse the available RTA kitchen cabinets or arrange a kitchen design consultation.
If the project includes a tall cabinet, review the complete pantry cabinet installation process before moving the unit into place.
RTA Cabinet Installation Mistakes FAQ
What should I check before installing RTA cabinets?
Confirm the cabinet codes, layout, room dimensions, floor high point, wall condition, appliance specifications, service locations, fillers, door swing and suitable structural support. Assemble each cabinet square and inspect it before placing it in the final run.
What is the most expensive cabinet installation mistake to correct?
The cost depends on when the error is found and what has already been completed. Measurement, layout or level errors discovered after cabinets are fastened—or after a countertop has been templated—can require substantial rework. A complete pre-fastening check reduces that risk.
Should cabinets be fastened before adjacent units are positioned?
Avoid final fastening until the relevant cabinet run has been positioned and checked for level, plumb, face alignment, fillers and appliance openings. The exact installation order depends on the cabinet system and site, but fasteners should secure an already correct position rather than create it.
Can drywall anchors support wall or pantry cabinets?
Do not assume general drywall anchors are suitable structural support for loaded cabinets. The connection must match the wall construction, cabinet mounting system, expected load and manufacturer requirements. Use appropriate framing, blocking, masonry support or an approved engineered method, and consult a qualified installer when uncertain.
Why did the cabinet door gaps change after installation?
Door gaps can change when the cabinet is leveled, connected or fastened. First confirm that the cabinet remains square and has not been twisted against an uneven surface. Complete final hinge adjustment only after the box is stable and secure.
When should I stop and call an installer?
Use a qualified installer or appropriate trade when the wall support is uncertain, concealed plumbing or wiring may be in the drilling area, the cabinet cannot be leveled without distortion, or the installation conflicts with appliance, electrical, plumbing, ventilation or local building requirements.

Sang Vi is a Senior Interior Designer and founder of Wedesign Interior Lab, as well as CEO of the Wedesign Interior Lab, MOC Concepts (Kitchen Cabinets), and Sang Vi Woodworking Manufacturer group. Since 2019, Sang has led an NKBA-certified team specializing in kitchen planning and cabinetry, completing dozens of projects each year across Toronto and other regions in Canada. With deep, hands-on experience in both custom millwork and ready-to-assemble (RTA) kitchen cabinets, Sang focuses on creating designs that are functional, durable, and easy to install. On this RTA platform, Sang shares practical, real-world insights to help homeowners choose, plan, and optimize their kitchen cabinet systems with confidence