Pantry cabinets are one of the most useful storage solutions in a kitchen, especially when homeowners need more space for dry food, small appliances, cleaning supplies, cookware or everyday kitchen items. But because pantry cabinets are usually tall, deep and heavy, they must be measured, assembled, leveled and secured properly before the kitchen is considered complete.
This guide explains how pantry cabinet installation works in Canadian kitchens, with a focus on RTA pantry cabinets, tall cabinet leveling, wall stud fastening, filler planning, door adjustment and final finishing. If you are planning a kitchen renovation, rental upgrade, condo project or contractor job, this article will help you understand what to check before installing a pantry cabinet.
RTA Cabinet Depot supplies ready-to-assemble kitchen cabinets and pantry cabinets for homeowners, contractors, landlords and renovation projects across Canada. Our goal is to help you choose the right cabinet size, plan the right layout and prepare for a clean installation.
Quick Answer: What Is Pantry Cabinet Installation?
Pantry cabinet installation is the process of measuring the kitchen space, assembling the pantry cabinet box, positioning the tall cabinet, leveling it from side to side and front to back, securing it to wall studs, then installing shelves, doors, fillers, panels and toe kicks for a clean finished look.
In This Pantry Cabinet Installation Guide
1. What Is a Pantry Cabinet?
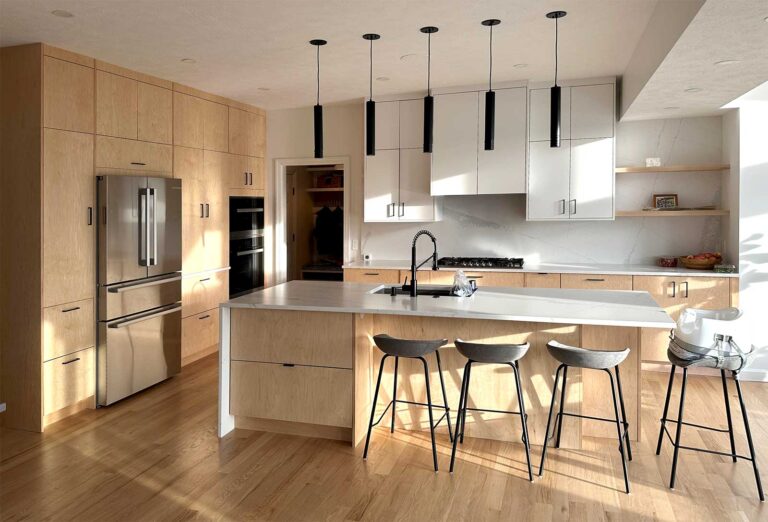
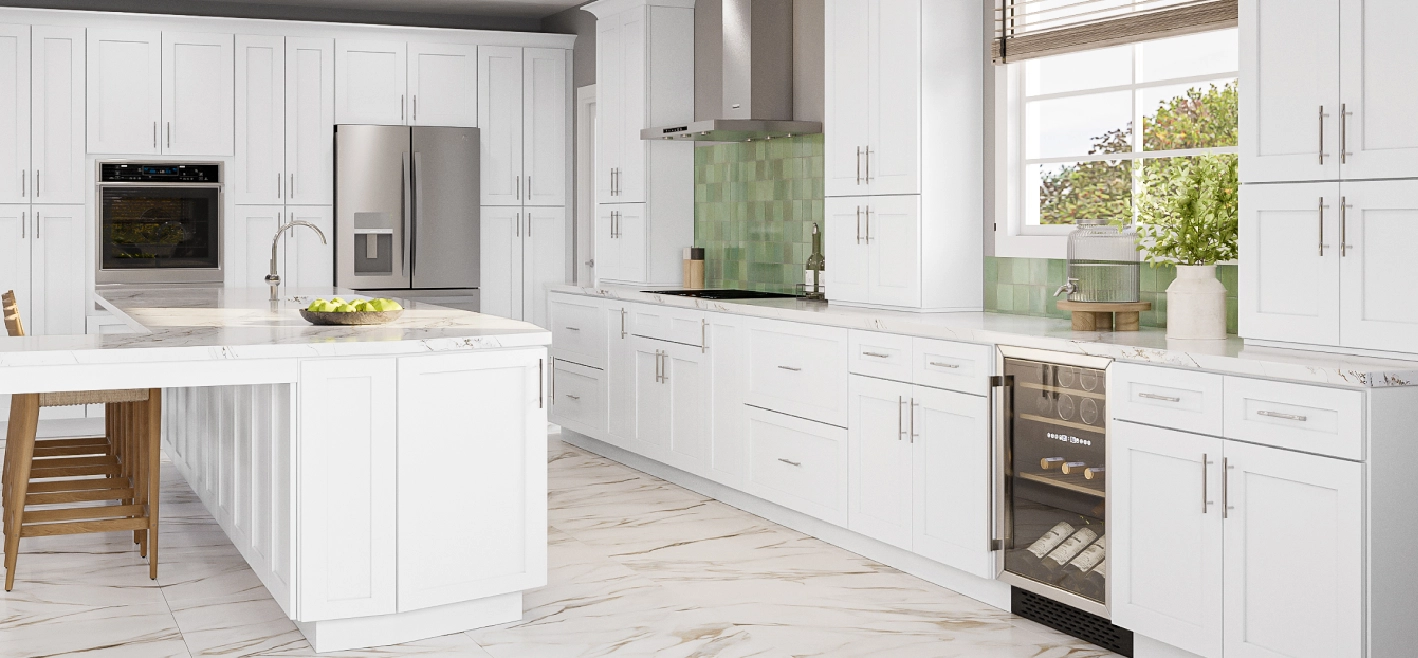
A pantry cabinet is a tall kitchen cabinet designed for storage. In many Canadian homes, it is used to store dry food, snacks, canned goods, small appliances, cleaning products, cookware or extra kitchen supplies. Unlike a walk-in pantry room, a pantry cabinet is built into the kitchen layout and usually sits beside base cabinets, fridge panels, wall cabinets or full-height panels.
When people search for pantry cabinet installation, they are usually not just looking for design ideas. They want to know how to install a tall pantry cabinet safely, how to measure the space, how to keep it level and how to make sure it lines up with the rest of the kitchen cabinets.
If you are still choosing the right pantry style, layout or size, you can also read our detailed guide on RTA pantry cabinet layouts and sizing tips. That guide helps with planning before installation, while this article focuses on the actual installation process.
1.1 Why Pantry Cabinet Installation Needs Extra Care
A pantry cabinet is usually taller than a base cabinet and heavier than many wall cabinets. Because of that, small mistakes can become very visible after installation. If the cabinet is not level, the doors may look uneven. If it is not secured properly, it may feel unstable. If filler space is not planned, doors and handles may hit the wall or nearby appliances.
A proper installation should solve three main problems: keeping the cabinet straight, making the cabinet safe, and making the cabinet look aligned with the rest of the kitchen.
2. Before Installing Pantry Cabinets: Measure the Kitchen Space
Good pantry cabinet installation starts before the cabinet is assembled. The first step is measuring the available space and checking the kitchen condition. A pantry cabinet is tall, so a small measuring mistake can create problems with ceiling clearance, filler space, door swing or alignment with nearby cabinets.
Before ordering or installing a pantry cabinet, check these measurements carefully:
- ✓Ceiling height: Make sure the pantry cabinet can stand upright in the room and still leave enough space for installation adjustment.
- ✓Wall width: Measure the full space where the pantry cabinet will sit, including any filler space beside walls, panels or appliances.
- ✓Cabinet depth: Confirm whether the pantry cabinet depth will line up with base cabinets, fridge panels or nearby tall cabinets.
- ✓Floor level: Check whether the floor slopes from left to right or front to back, especially in older homes.
- ✓Wall condition: Check if the wall is straight, bowed or uneven before fixing the cabinet to the studs.
- ✓Door swing: Make sure pantry doors can open without hitting walls, handles, appliances or islands.
- ✓Baseboard and trim: Remove or plan around baseboards if they block the cabinet from sitting close to the wall.
For a full kitchen layout, pantry cabinets should not be planned alone. They need to work with the rest of the kitchen, including base cabinets, wall cabinets, fridge space, stove space, dishwasher location and walking clearance. If you are comparing different kitchen layouts, visit our guide on kitchen cabinet layouts in Canada.
2.1 Quick Measurement Checklist
3. Standard Pantry Cabinet Sizes
Pantry cabinet dimensions can change depending on the cabinet line, door style and kitchen design. However, most pantry cabinets are designed as tall storage cabinets and often come in standard height, width and depth options. Understanding these sizes helps homeowners and contractors avoid wrong orders and installation delays.
Common pantry cabinet heights are often 84, 90 or 96 inches. Common widths include 15, 18 and 24 inches, while 24-inch depth is commonly used when the pantry needs to align with base cabinets and fridge panels.
For more detail about cabinet sizes, base cabinet depth, wall cabinet height and full kitchen planning, read our standard kitchen cabinet dimensions and styles guide.
4. Tools and Materials Needed for Pantry Cabinet Installation
Installing a pantry cabinet requires more than simply placing a tall cabinet against the wall. The installer needs to assemble the cabinet correctly, check the floor and wall, locate studs, level the cabinet and secure it safely. Using the right tools helps reduce mistakes during the installation.
- ✓Measuring tape
- ✓Level
- ✓Stud finder
- ✓Drill or impact driver
- ✓Cabinet screws
- ✓Clamps
- ✓Shims
- ✓Screwdriver
- ✓Pencil or marking tool
- ✓Safety gloves and eye protection
For RTA pantry cabinets, you should also check all panels, hinges, shelves, screws, legs, clips and hardware before assembly. Missing parts or wrong panels can slow down the installation and create alignment issues later.
5. How to Install Pantry Cabinets Step by Step
The exact installation process can change based on the kitchen layout, cabinet system and wall condition. However, most RTA pantry cabinet installations follow a similar order. The goal is to assemble the cabinet square, place it correctly, level it carefully and secure it safely.
Step 1: Confirm the Layout Before Assembly
Before opening the cabinet box, confirm where the pantry cabinet will sit in the kitchen. Check whether it is beside a wall, refrigerator, base cabinet run, full-height panel or open space. Also confirm the door swing direction and whether fillers are needed on one or both sides.
Step 2: Unpack and Inspect the RTA Pantry Cabinet
Open the packaging carefully and inspect all parts before assembly. Make sure the side panels, top and bottom panels, shelves, back panel, doors, hinges and hardware are present. If any parts are damaged or missing, it is better to find the issue before the cabinet is assembled and installed.
If you are new to RTA cabinets, our step-by-step guide to assembling RTA cabinets explains the basic assembly process in more detail.
Step 3: Assemble the Pantry Cabinet Box
Build the cabinet box on a clean, flat surface. Follow the cabinet assembly instructions and make sure all panels are connected squarely. A pantry cabinet that is not assembled square can cause door gaps, uneven shelves and poor alignment with nearby cabinets.
Step 4: Move the Pantry Cabinet Into Position
After the box is assembled, carefully move the pantry cabinet into its planned location. Tall cabinets can be heavy and awkward to handle, so two people are usually better than one. Avoid dragging the cabinet across finished flooring, and keep the cabinet supported while positioning it.
Step 5: Level the Tall Pantry Cabinet
Leveling is one of the most important parts of pantry cabinet installation. A tall pantry cabinet must be level from side to side and front to back. If the cabinet is not level, the doors may swing open, the shelves may look uneven and the cabinet may not line up with other kitchen cabinets.
Use a level on the front, side and inside of the cabinet. If the floor is uneven, use shims or adjustable legs depending on your cabinet system. Check the cabinet again after every adjustment. Small changes at the bottom of a tall pantry cabinet can create visible differences at the top.
If your kitchen has an uneven wall or floor, this guide on installing RTA cabinets on uneven floors and walls can help you understand the common problems before installation starts.
Step 6: Secure the Pantry Cabinet to Wall Studs
A pantry cabinet should be secured properly to the wall, especially because it is tall and may hold heavy items. Use a stud finder to locate wall studs behind the cabinet. The cabinet should be fastened into studs, not only into drywall.
Before fastening, confirm that the cabinet is still level and aligned. Then secure the cabinet through the appropriate back rail or mounting area. Use proper cabinet screws and avoid over-tightening, which can pull the cabinet out of square or damage the panel.
Important: A tall pantry cabinet should not be treated like a small freestanding storage unit. For safety and long-term performance, it should be fixed securely and checked for level before doors and shelves are fully loaded.
Step 7: Connect the Pantry Cabinet With Nearby Cabinets
If the pantry cabinet is part of a full kitchen run, connect it with nearby base cabinets, wall cabinets, fridge panels or tall panels as required. Use clamps to hold cabinets flush before fastening them together. This helps keep the front edges aligned and reduces visible gaps.
Step 8: Install Shelves, Doors, Fillers and Toe Kicks
After the pantry cabinet is level and secure, install the shelves, doors, fillers, side panels and toe kicks. Adjust the hinges so the door gaps look even from top to bottom. If the pantry has multiple doors, check that all doors sit straight and open smoothly.
Step 9: Final Check Before Loading the Pantry Cabinet
Before placing food, dishes or appliances inside the pantry cabinet, check the full installation one more time. Confirm that the cabinet is secure, the doors open correctly, the shelves sit properly and the cabinet does not move when gently tested.
6. Common Pantry Cabinet Installation Mistakes
Many pantry cabinet problems happen because the cabinet was not measured, leveled or secured correctly. These issues can be avoided with better preparation and a careful installation process.
6.1 Not Checking Ceiling Clearance
A pantry cabinet may fit on paper, but it still needs enough room to stand up and be adjusted during installation. Always check the real ceiling height, flooring thickness, ceiling bulkheads and any trim that may affect the final fit.
6.2 Installing the Cabinet on an Uneven Floor Without Adjustment
Older homes and rental properties often have floors that are not perfectly level. If the pantry cabinet is placed directly on an uneven floor without shims or leg adjustment, the door gaps may look wrong and the cabinet may not line up with the rest of the kitchen.
6.3 Securing the Pantry Cabinet Only to Drywall
A tall pantry cabinet should be secured into wall studs whenever possible. Drywall alone does not provide the same support, especially when the cabinet is loaded with food, dishes or kitchen supplies.
6.4 Forgetting Filler Space Beside a Wall
If a pantry cabinet is installed directly against a side wall without enough filler, the door or handle may hit the wall when opened. Filler space also helps installers adjust for walls that are not straight.
6.5 Rushing Door Adjustment
Even when the pantry cabinet box is installed correctly, the doors still need hinge adjustment. Uneven gaps, rubbing doors and doors that do not close properly can often be corrected during the final adjustment stage.
For more installation issues to avoid, read our guide on 5 common mistakes when installing RTA cabinets. If the problem happens during cabinet assembly, this article on RTA cabinet assembly problems and fixes in Canada may also help.
7. DIY vs Professional Pantry Cabinet Installation
Some homeowners can assemble and install RTA pantry cabinets themselves, especially if they are comfortable using tools and following cabinet instructions. However, pantry cabinets are taller than most base or wall cabinets, so the installation requires more care. The cabinet must be square, level and safely secured to the wall.
DIY pantry cabinet installation may work if the kitchen space is simple, the floor is level and the cabinet is not part of a complicated full kitchen layout. Professional installation is usually better when the pantry cabinet is part of a full renovation, when the wall or floor is uneven, when fillers and panels are required or when the homeowner wants a cleaner finished result.
8. Where Pantry Cabinets Fit in a Kitchen Layout
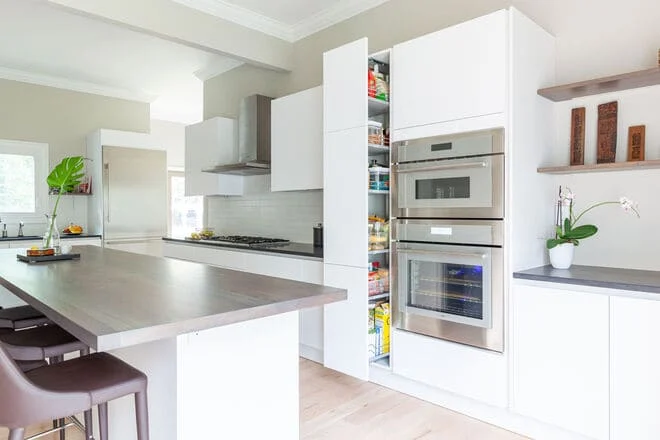
A pantry cabinet can be installed in several different areas of a kitchen. The best location depends on the room size, appliance placement and storage needs. In smaller kitchens, a narrow pantry cabinet can add useful storage without taking over the layout. In larger kitchens, a tall pantry can become part of a full wall of storage beside a refrigerator or oven cabinet.
Common pantry cabinet locations include:
- ✓Beside the refrigerator as part of a tall cabinet section.
- ✓At the end of a base cabinet run.
- ✓Beside a wall with filler space for door clearance.
- ✓Near the cooking area for food storage.
- ✓Near the kitchen entrance for easy access to daily items.
If you are planning a full kitchen design, you may also want to compare layout options such as L-shaped, U-shaped and galley kitchens. Our guide on L-shaped, U-shaped and galley kitchen layouts can help you choose a better layout before installation.
For modern kitchen storage planning, you can also explore our guide on kitchen cabinet solutions for modern layouts.
9. Need Pantry Cabinet Supply in Canada?
If you are not only researching installation but also looking for pantry cabinet supply, RTA Cabinet Depot provides ready-to-assemble kitchen cabinets for homeowners, contractors, landlords and renovation projects across Canada. RTA cabinets are useful when you need a faster cabinet supply process, easier transportation and flexible sizing for full kitchen layouts.
For pantry cabinet projects, our team can help you confirm cabinet height, cabinet width, filler space, door clearance and how the pantry cabinet connects with nearby base cabinets, wall cabinets, fridge panels or tall panels. You can explore our cabinet options here: RTA kitchen cabinets in Canada.
10. RTA Pantry Cabinets for Canadian Kitchens
RTA pantry cabinets are a practical option for homeowners, contractors and landlords who want flexible storage with a more efficient cabinet supply process. Because the cabinets are ready-to-assemble, they are easier to transport and can be assembled on-site before installation.
For Canadian kitchen projects, RTA pantry cabinets can be used in condos, rental homes, townhouses, basement kitchens and full kitchen renovations. The key is to choose the right pantry cabinet size, confirm the layout and install the cabinet correctly so it functions well over time.
To understand the broader cabinet installation process, you can also read our RTA cabinets installation guide and our guide to kitchen cabinet installation in Canada.
Get a Free 3D Kitchen Layout & Pantry Cabinet Sizing Help
Planning a pantry cabinet or full kitchen cabinet layout in Canada? RTA Cabinet Depot can help you choose the right pantry cabinet size, check layout clearance, plan filler space and prepare a free 3D kitchen layout before you order.
Call +1 888 973 5636 or visit rtadepot.ca.
Explore cabinet options: RTA kitchen cabinets
11. Pantry Cabinet Installation FAQ
What is the best way to install a pantry cabinet?
The best way to install a pantry cabinet is to measure the space first, assemble the cabinet square, move it into position, level it carefully, secure it to wall studs and then adjust the doors, shelves, fillers and toe kicks for a clean finish. Because pantry cabinets are tall, you should check both side-to-side level and front-to-back level before loading the cabinet with food, dishes or small appliances.
Do pantry cabinets need to be secured to the wall?
Yes. Because pantry cabinets are tall and often hold heavy items, they should be secured to the wall, preferably into wall studs. This helps keep the cabinet stable and safer for everyday use. Drywall alone is usually not the best support point for a tall cabinet, so installers should locate studs and fasten through the correct cabinet rail or mounting area.
Can I install an RTA pantry cabinet myself?
You can install an RTA pantry cabinet yourself if you are comfortable with measuring, assembly, leveling, drilling and fastening cabinets to the wall. A simple pantry cabinet in a straight wall area may be manageable for an experienced DIY homeowner. If the kitchen has uneven floors, tight filler areas, appliance panels or a full cabinet layout, professional installation may be a better choice.
What size pantry cabinet should I choose?
The right pantry cabinet size depends on your ceiling height, kitchen layout, storage needs and available wall space. Common pantry cabinet heights include 84″, 90″ and 96″, while common widths include 15″, 18″ and 24″. Always confirm real site measurements before ordering, especially if the pantry cabinet sits beside a refrigerator, wall, full-height panel or base cabinet run.
Why is my pantry cabinet door uneven after installation?
Uneven pantry cabinet doors can happen when the cabinet is not level, the box is not square or the hinges need adjustment. Check the cabinet level first, then adjust the hinges until the door gaps look even. If the door gap changes from top to bottom, the issue may be caused by floor slope, a twisted cabinet box or improper fastening to the wall.
Should I install the pantry cabinet before or after base cabinets?
In many kitchen installations, tall cabinets such as pantry cabinets are positioned and leveled carefully with the rest of the cabinet run. The best order depends on the layout, but the pantry must align with nearby cabinets, panels and toe kicks before final fastening. The installer should check the face line, door line and filler space before making the final connection.

Sang Vi is a Senior Interior Designer and founder of Wedesign Interior Lab, as well as CEO of the Wedesign Interior Lab, MOC Concepts (Kitchen Cabinets), and Sang Vi Woodworking Manufacturer group. Since 2019, Sang has led an NKBA-certified team specializing in kitchen planning and cabinetry, completing dozens of projects each year across Toronto and other regions in Canada. With deep, hands-on experience in both custom millwork and ready-to-assemble (RTA) kitchen cabinets, Sang focuses on creating designs that are functional, durable, and easy to install. On this RTA platform, Sang shares practical, real-world insights to help homeowners choose, plan, and optimize their kitchen cabinet systems with confidence